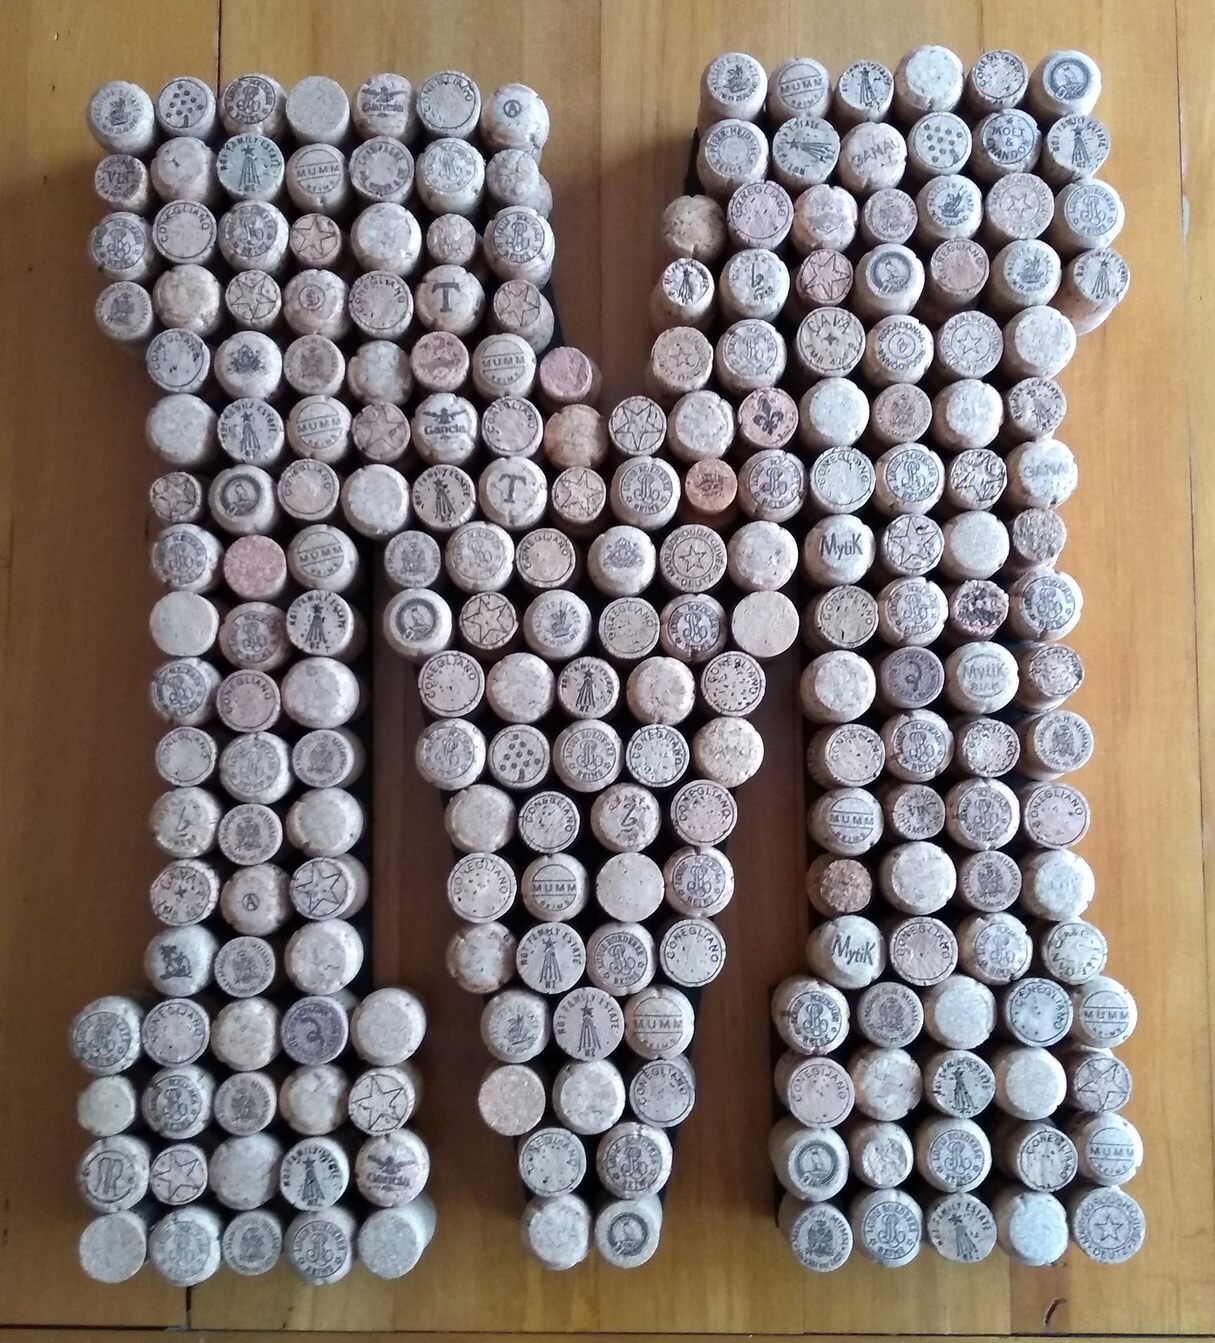
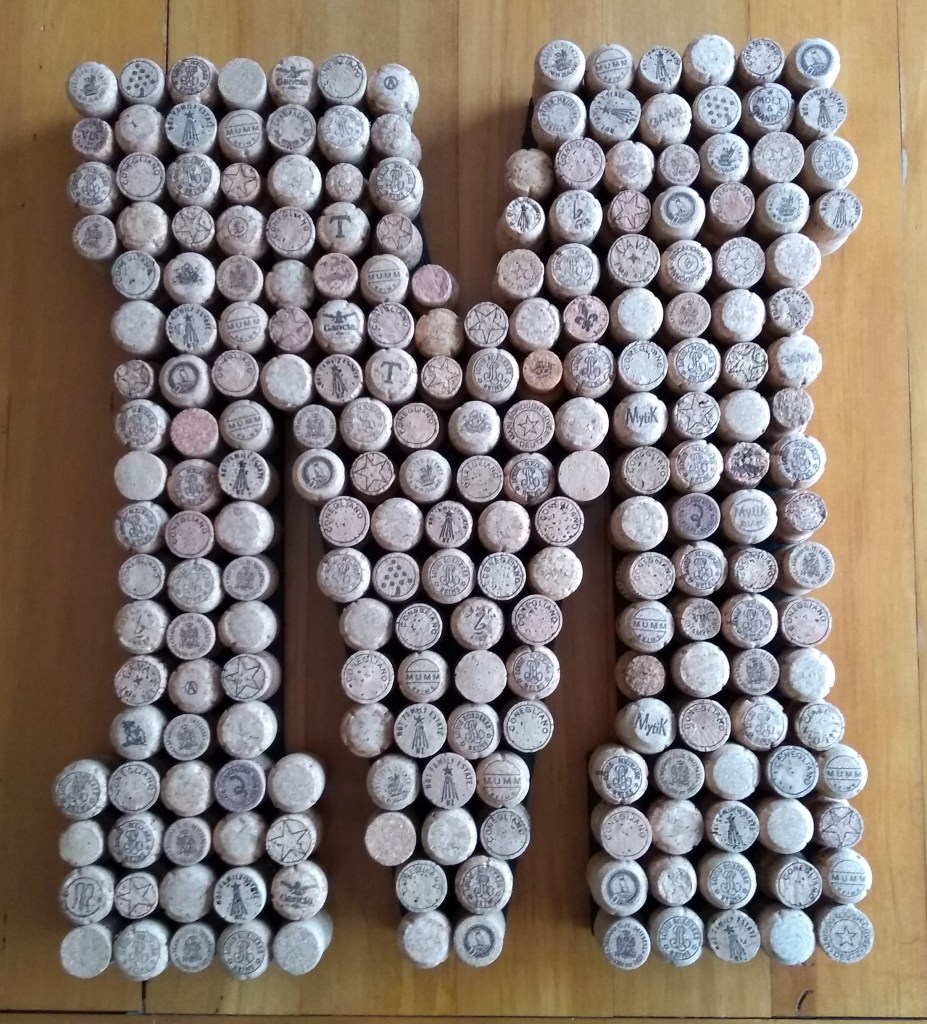
This week we made a letter M (for our family’s surname) covered with champagne and sparkling wine corks. Before anyone gets concerned about my level wine consumption, I bought the vast majority of these corks online. You can still get hold of champagne corks quite easily for crafting, though corks from still wine (the straight kind) are mostly a thing of the past with the adoption of screw caps.
Things you will need:
A large MDF letter of your choice (If you live in NZ you can get one made custom from My backyard creations on Trade me for a very reasonable price)
Enough corks to cover your letter (also bought from Trade me)
Black poster paint
Acrylic sealer
PVA wood glue
Instructions:
Paint your letter with black poster paint. Give it a couple of coats. Once painted and dry, give it a spray with acrylic sealer.
Glue on your corks to cover the letter. Because we were using champagne corks, I alternated which way up I put them as they fit closer together this way.
What the kids can do:
Miss 5 helped to paint the letter black.
I would recommend you arrange the corks on you letter before you start gluing to find the best arrangement to get around any tricky corners or curves. Miss 5 lost interest in this rather quickly. But when it came to the gluing part, this went quite quicky. Miss 5 and I alternated gluing and sticking jobs.
Once finished, we plan to hang it on the wall. We can then use it at a pin board to any of the kids little art works.
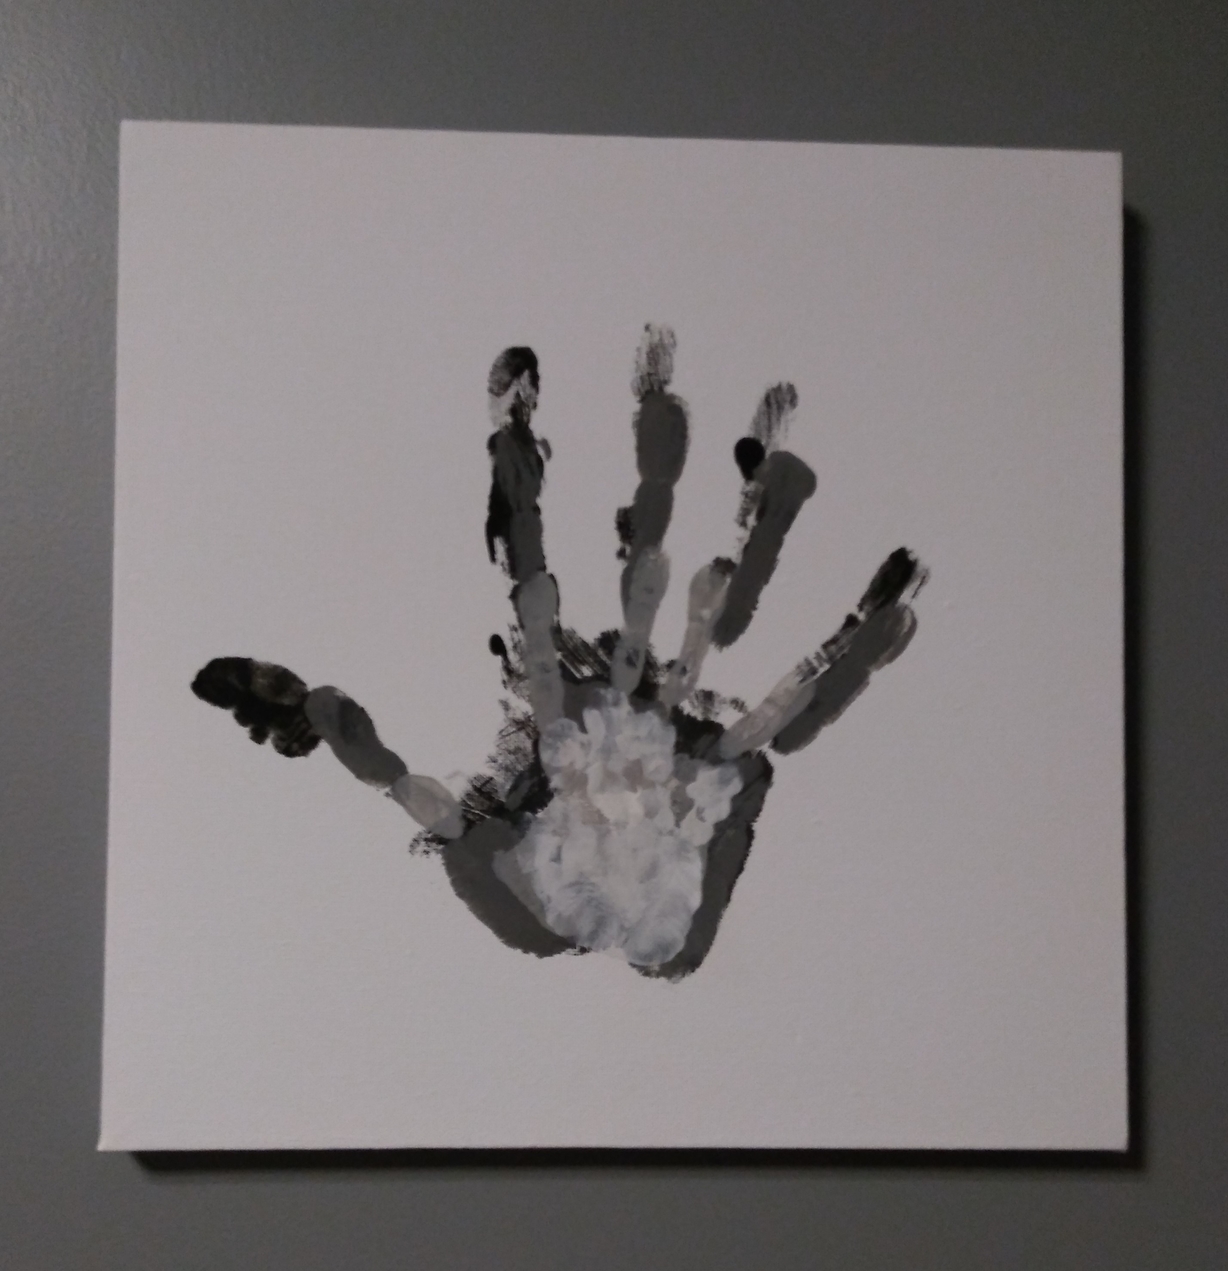
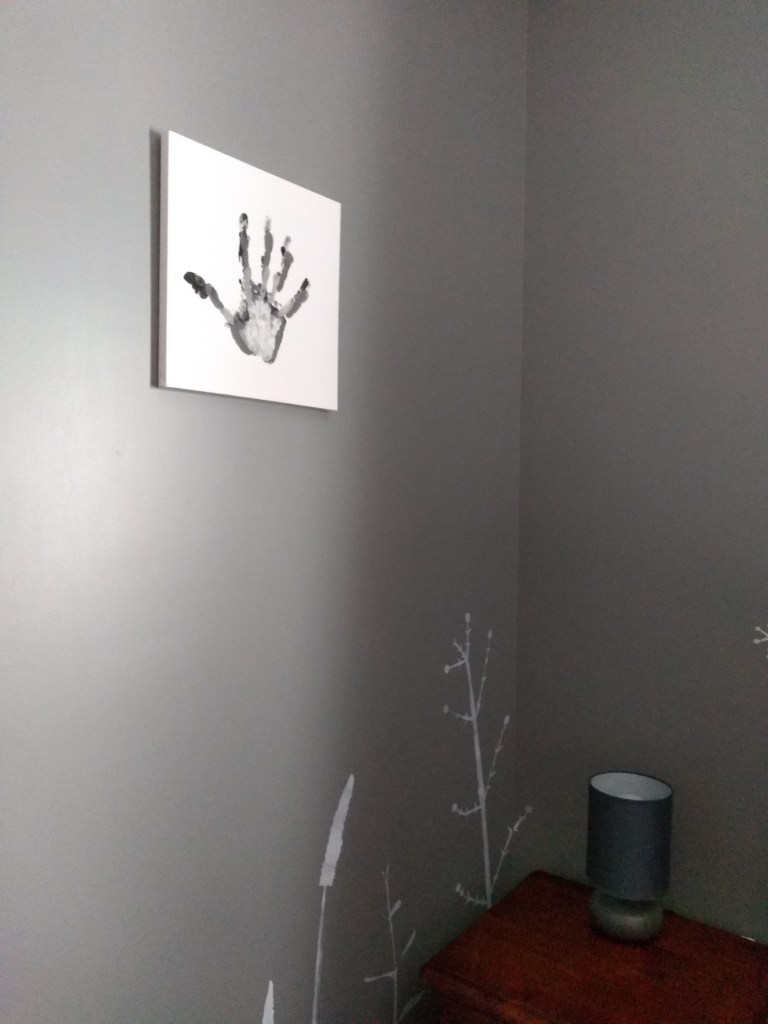
This is an art project that is simple to do and involves the whole family. It is also a snapshot in time of just how little little hands were for the future.
Things you need:
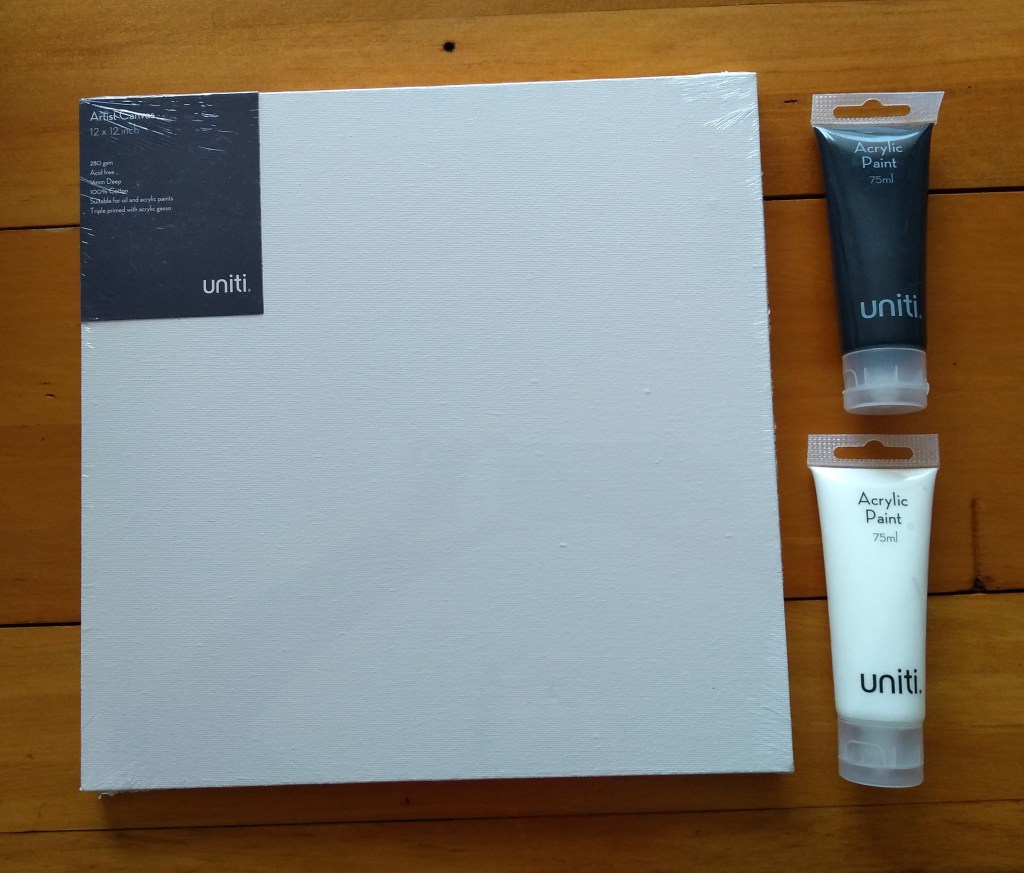
30 cm2 (12 inch2) ready made canvas. Acrylic paint (we used black and white, and mixed shades if gray. a hand from everyone in the family
Instructions:
Start with the person with the largest hand.
Paint with the darkest colour and put hand-print in the centre of the canvas. Allow to dry.
Repeat until all family members have their print on canvas. Make sure to writes names and the date for posterity.
Hang in pride of place.
What the kids can do:
Miss 5 helped to paint the grown-ups hands, and did her own hand-print. The hardest part for her was waiting for the paint to dry in between.
In order to do Mr 7 months’ hand-print, two grown-ups were required, one to distract, and one to paint and make hand-print.
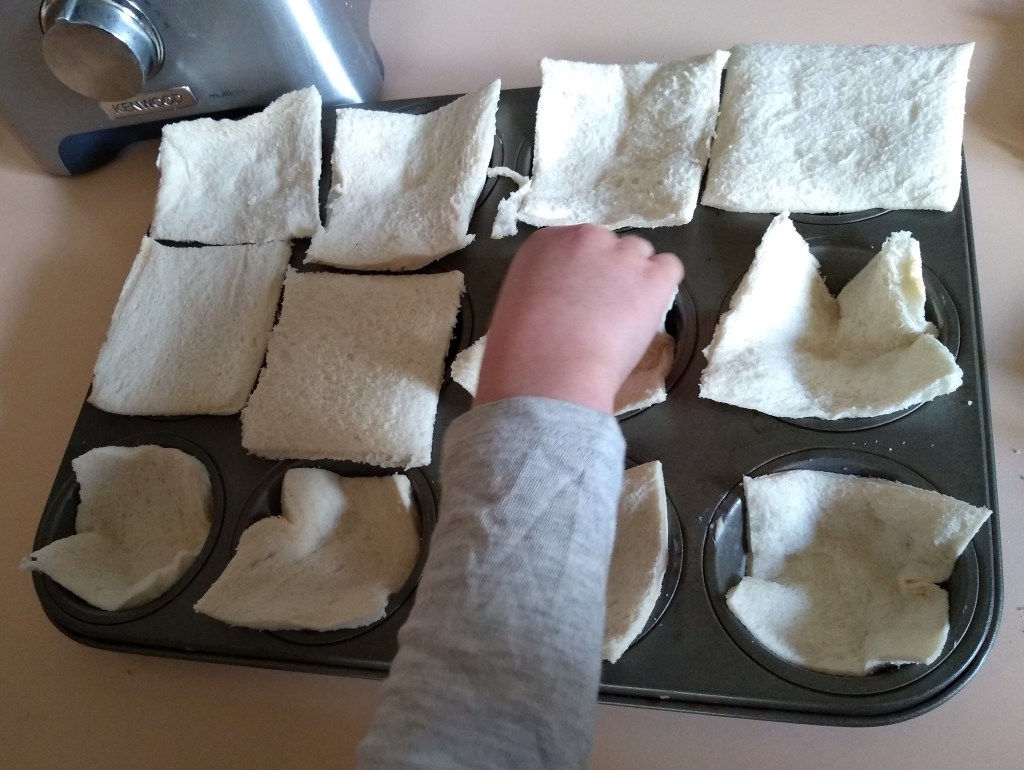
Miss 5 is starting school on Monday and I went looking online for lunch box ideas. I found this Taste recipe. I have adapted it to include foods that Miss 5 actually likes and things we had available.
Ingredients
12 slices of bread 4 free-range eggs fresh Italian parsley 3/4 cup chopped roast chicken 1/2 cup frozen veges (we did peas and corn) 100g cheese, grated
Instructions:
Preheat the oven to 180° (356°F).
Cut of the crusts of 12 slices of bread. Press them into a 12 hole greased muffin tray. Bake at 180° (356°F) for 10 minutes.
Turn the oven down to 170° (338°F).
Beat the eggs, and add in chopped fresh Italian parsley to taste.
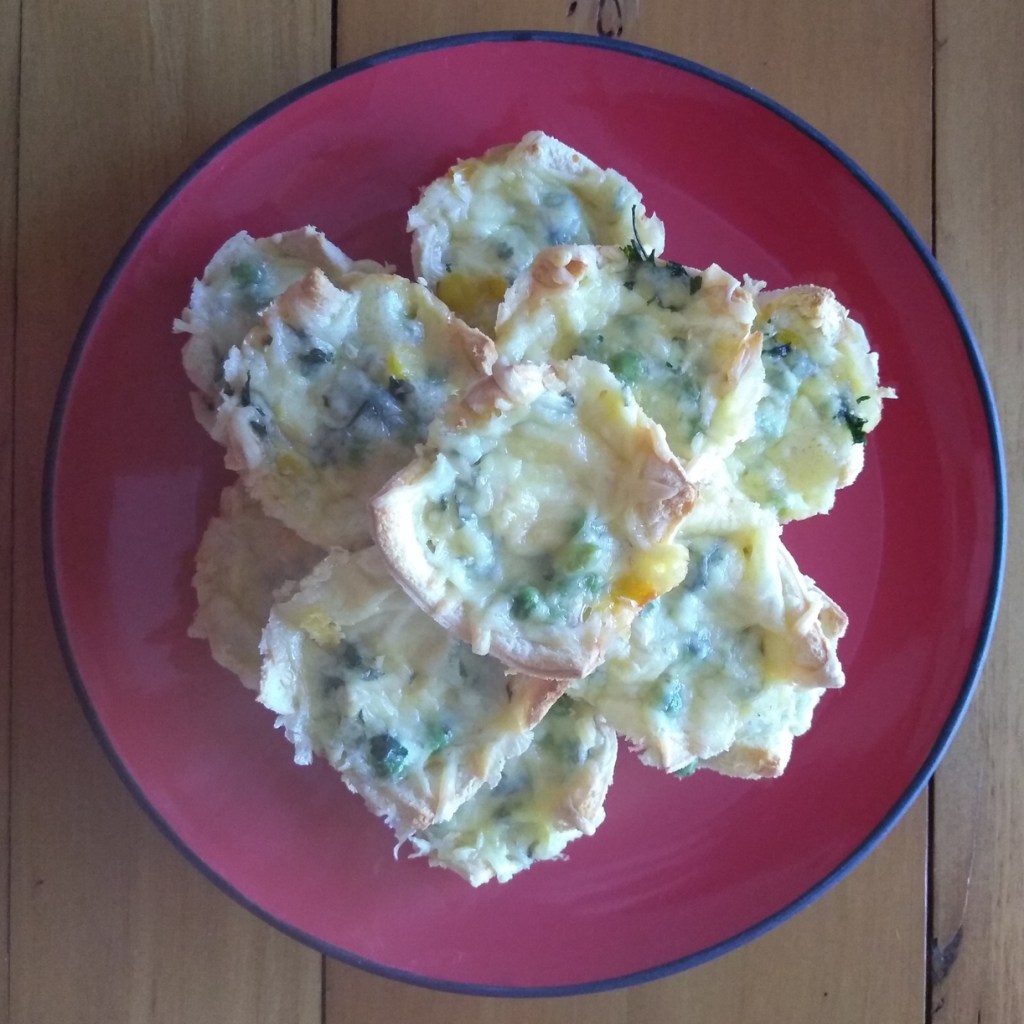
Into the baked bread bases distributed the chicken, frozen veges, and cheese. Pour over the egg mixture and bake at 170° (338°F) for 20-25 minutes.
What the kids can do:
Hand washing: Don’t forget to get the kids (and grownups too of course) to wash their hands before you start. Little hands always seem to end up touching everything, including the ingredients. This is extra important given the current Covid-19 situation. For good 20 second hand wash, have them sing “happy birthday to me” twice.
Eggs: Pro tip for breaking eggs with a 5 year old, break eggs into a separate glass bowl before adding to your other ingredients. That way you can see and pick out any bits of shell before they are added in by mistake. I like to use free range eggs, because it is kinder to the chickens, and they also taste better. Bear in mind that raw eggs can carry Salmonella so wash little hands if they end up the raw egg.
Ingredients: Kids can help decide on which things can go in the quiches. They can then help chop/grate things to go into the quiches. If they like the things that go in, they should eats them once they are all in together.
These little quiches are great. You can make them with whatever ingredients you have on hand. They also freeze well, so you can make a batch, freeze them all, and then grab one for the lunchbox in the morning, and it will thaw out by lunch time.
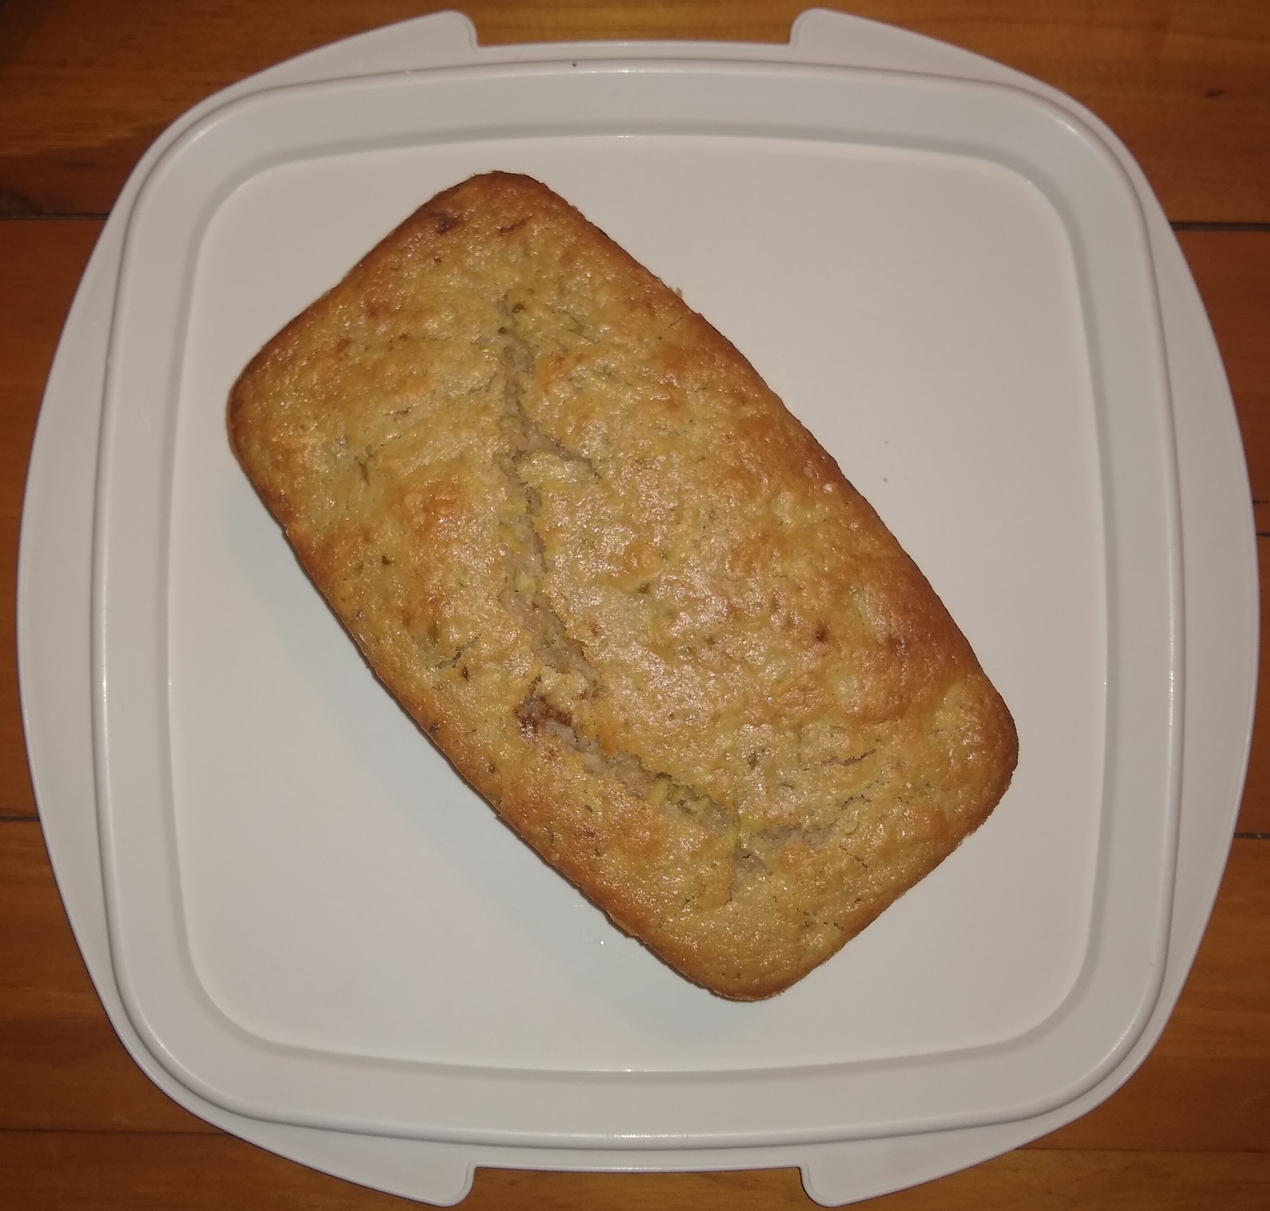
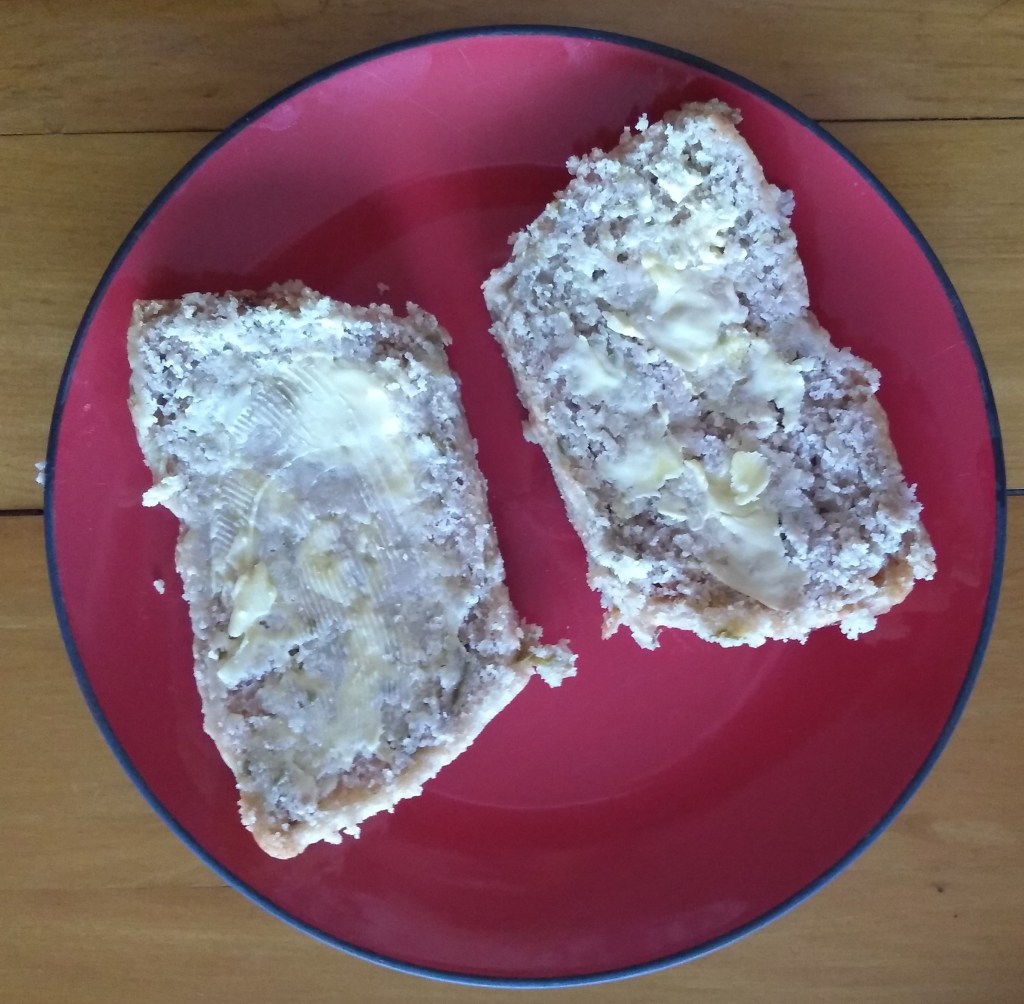
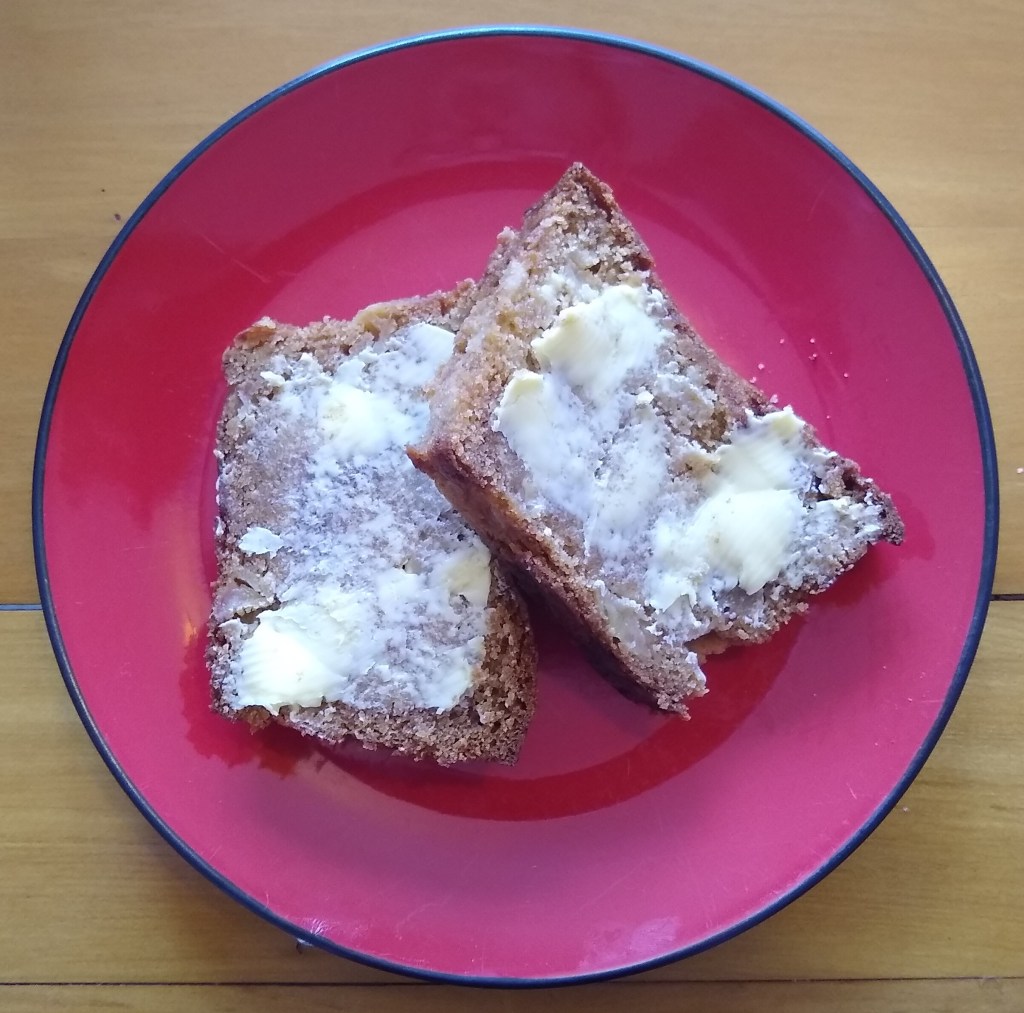
This recipe is a slight variation on one found over at the Chelsea sugar website. I have used my old “include the feijoa skin” trick to make this loaf extra feijoaey.
Ingredients:
10 small feijoas 1 cup boiling water 1 cup white sugar 50g butter 1 free range egg 2 cups self-raising flour 1 teaspoon baking soda
Instructions:
Preheat oven to 180°C (356°F).
Wash feijoas and cut off the flower end. In a food processor, grate feijoas, skin and all (should be about 1 cup once grated).
Combine grated feijoa, boiling water, sugar and butter in a pot, and warm on the stove until butter is fully melted. Remove from heat and beat in the free range egg.
Sift flour and baking soda together into a bowl. Make a well in the centre, and pour in wet ingredients. Fold ingredients together until combined.
Pour into a greased loaf tin. Bake at 180°C (356°F) for 45 minutes or until the loaf springs back when touched.
What the kids can do:
Hand washing: Don’t forget to get the kids (and grownups too of course) to wash their hands before you start. Little hands always seem to end up touching everything, including the ingredients. This is extra important given the current Covid-19 situation. For good 20 second hand wash, have them sing “happy birthday to me” twice.
Feijoas: Miss 5 likes to chop up the feijoas with a butter knife (for safety). Chopping them up is not strictly necessary, but she likes to do that job, before feeding them into the food processor and pushing them in with the plastic depressor. Bear in mind that little hands can fit down the shoot of the food processor, so always supervise this step.
Eggs: Pro tip for breaking eggs with a 5 year old, break eggs into a separate glass bowl before adding to your other ingredients. That way you can see and pick out any bits of shell before they are added in by mistake. I like to use free range eggs, because it is kinder to the chickens, and they also taste better. Bear in mind that raw eggs can carry Salmonella so wash little hands if they end up the raw egg. I also don’t recommend eating raw cake batter, just in case.
Mixing the ingredients: My daughter helped mix all the ingredients. The biggest messes seen to happen when sifting and mixing dry ingredients with the kids. A great tip from reader Dana M is to put a towel down underneath, which catches any stray ingredients for easy cleaning. When folding wet into dry ingredients, you want to mix thoroughly, but not too much or the loaf will go flat. This usually requires the grown up to either finish off the mixing and/or intervene before things are mixed too much.
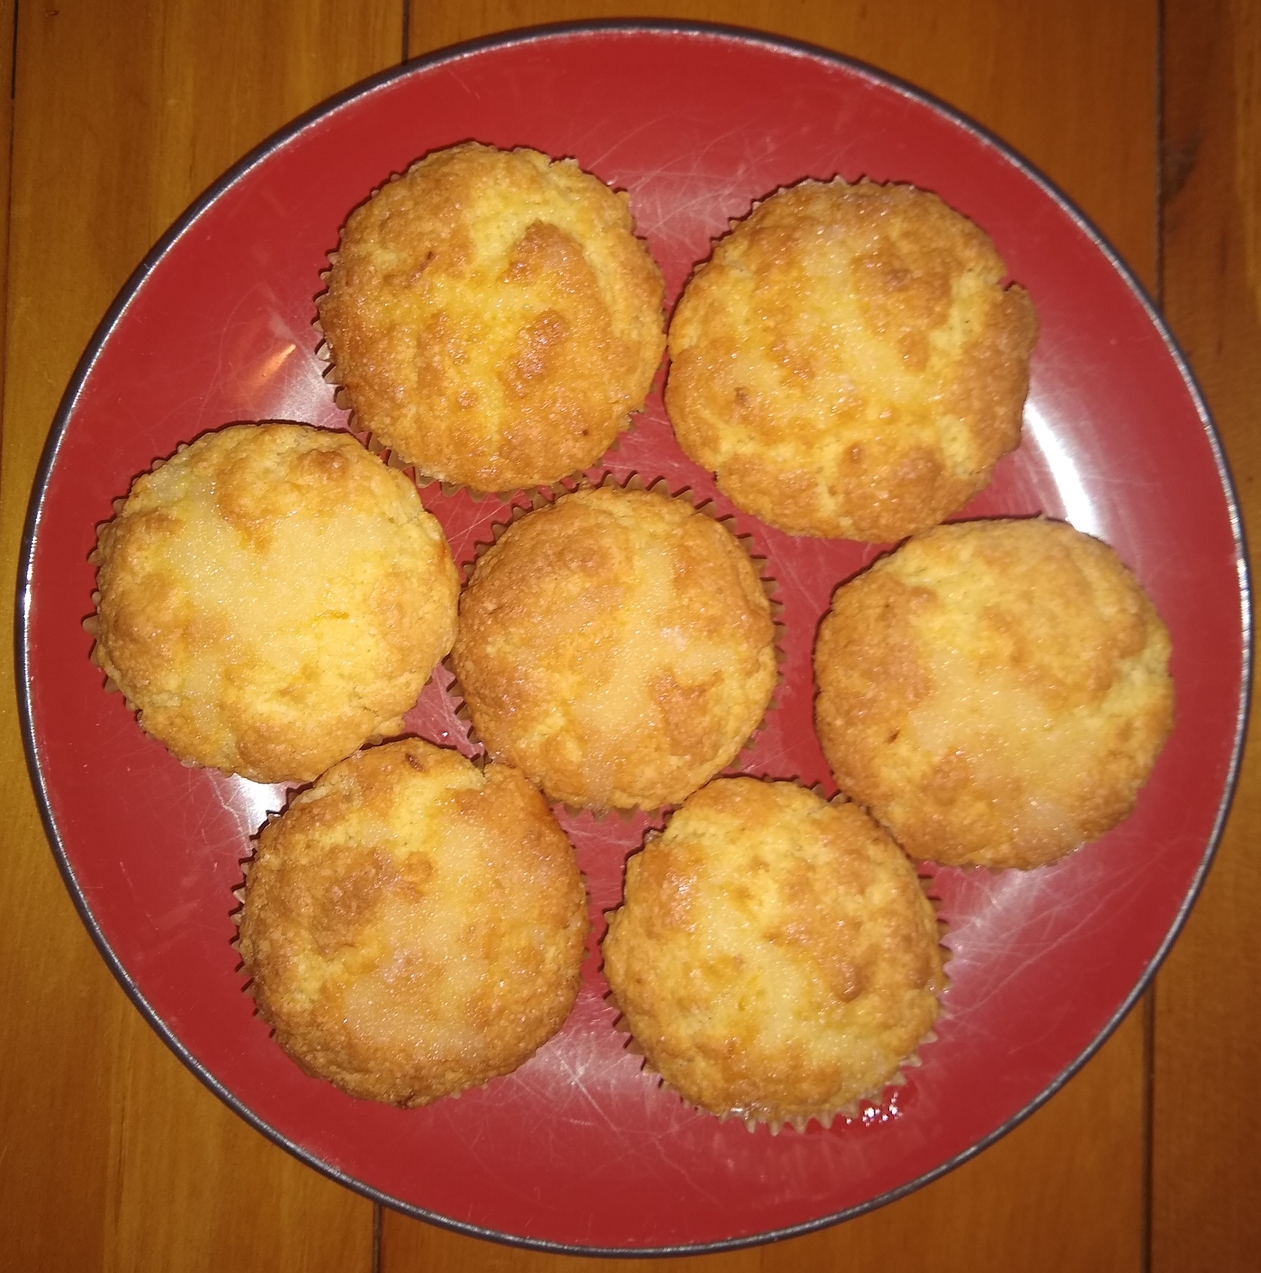
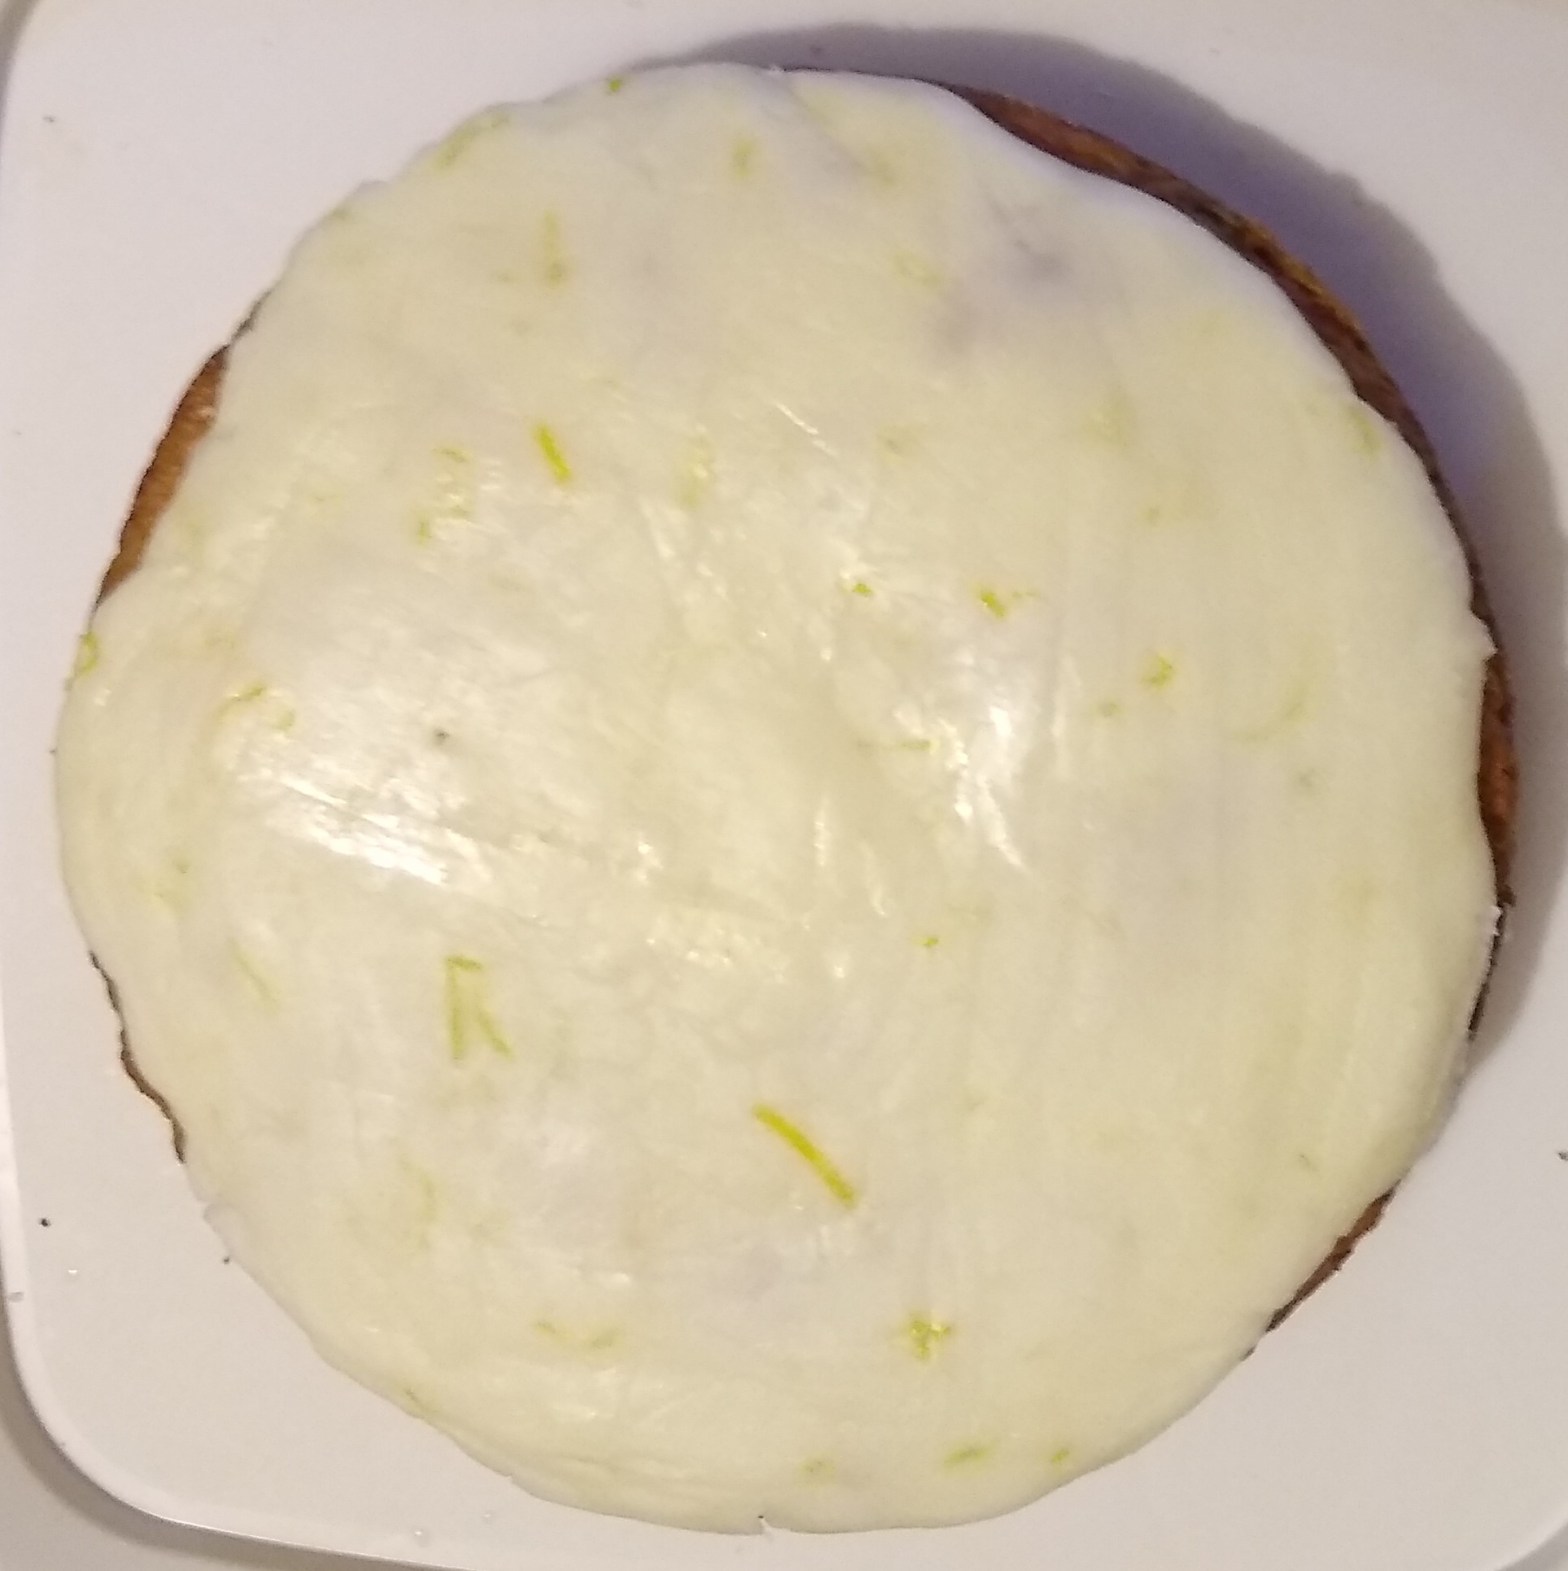
I used to make similar muffins to these many years ago. My first flat had a lemon tree out back, and couple of hungry flatmates, and these went down well. Our lemon tree has lots of lemons ripening at the moment, so we decided to give these a go. The recipe is a slight variation of this one from just a mum nz.
Ingredients:
Muffins:
1 cup white sugar 2 cups self-raising flour zest of 2 lemons 100 grams butter, melted 2 free-range eggs 1/2 cup milk
Topping:
juice of 2 lemons 1/4 cup white sugar
Instructions:
Preheat oven to 200°C (392°F).
Combine sugar, flour and lemon zest in a large bowl.
Combine melted butter, eggs and milk and whisk together.
Make a well in the centre of the dry ingredients and pour in wet ingredients. Fold ingredients together until combined.
Split mixture evenly across 12 muffin cases in a muffin tin.
Bake at 200°C (392°F) for 20 minutes or until muffins spring back when touched.
Make the topping by stirring together lemon juice and sugar to combine. Pour sugar suspension over muffins while still warm.
What the kids can do:
Hand washing: Don’t forget to get the kids (and grownups too of course) to wash their hands before you start. Little hands always seem to end up touching everything, including the ingredients. This is extra important given the current Covid-19 situation. For good 20 second hand wash, have them sing “happy birthday to me” twice.
Lemons: Miss 5 likes to zest the lemons. I just have to remind her to turn the lemon regularly or we end up with a lot of grated pith. She also likes to juice the lemons. We put a sieve in between to catch the pips.
Eggs: Pro tip for breaking eggs with a 5 year old, break eggs into a separate glass bowl before adding to your other ingredients. That way you can see and pick out any bits of shell before they are added in by mistake. I like to use free range eggs, because it is kinder to the chickens, and they also taste better. Bear in mind that raw eggs can carry Salmonella so wash little hands if they end up the raw egg. I also don’t recommend eating raw cake batter, just in case.
Mixing the ingredients: My daughter helped mix all the ingredients. The biggest messes seen to happen when sifting and mixing dry ingredients with the kids. A great tip from reader Dana M is to put a towel down underneath, which catches any stray ingredients for easy cleaning. When folding wet into dry ingredients, you want to mix thoroughly, but not too much or the cake will go flat. This usually requires the grown up to either finish off the mixing and/or intervene before things are mixed too much.
Cupcake cases: Miss 5 likes to add the cupcake cases to the muffin tray and then spoon in the ingredients. She is getting pretty good at it with minimal mess made and only a minimum amount of batter redistribution required on my part.
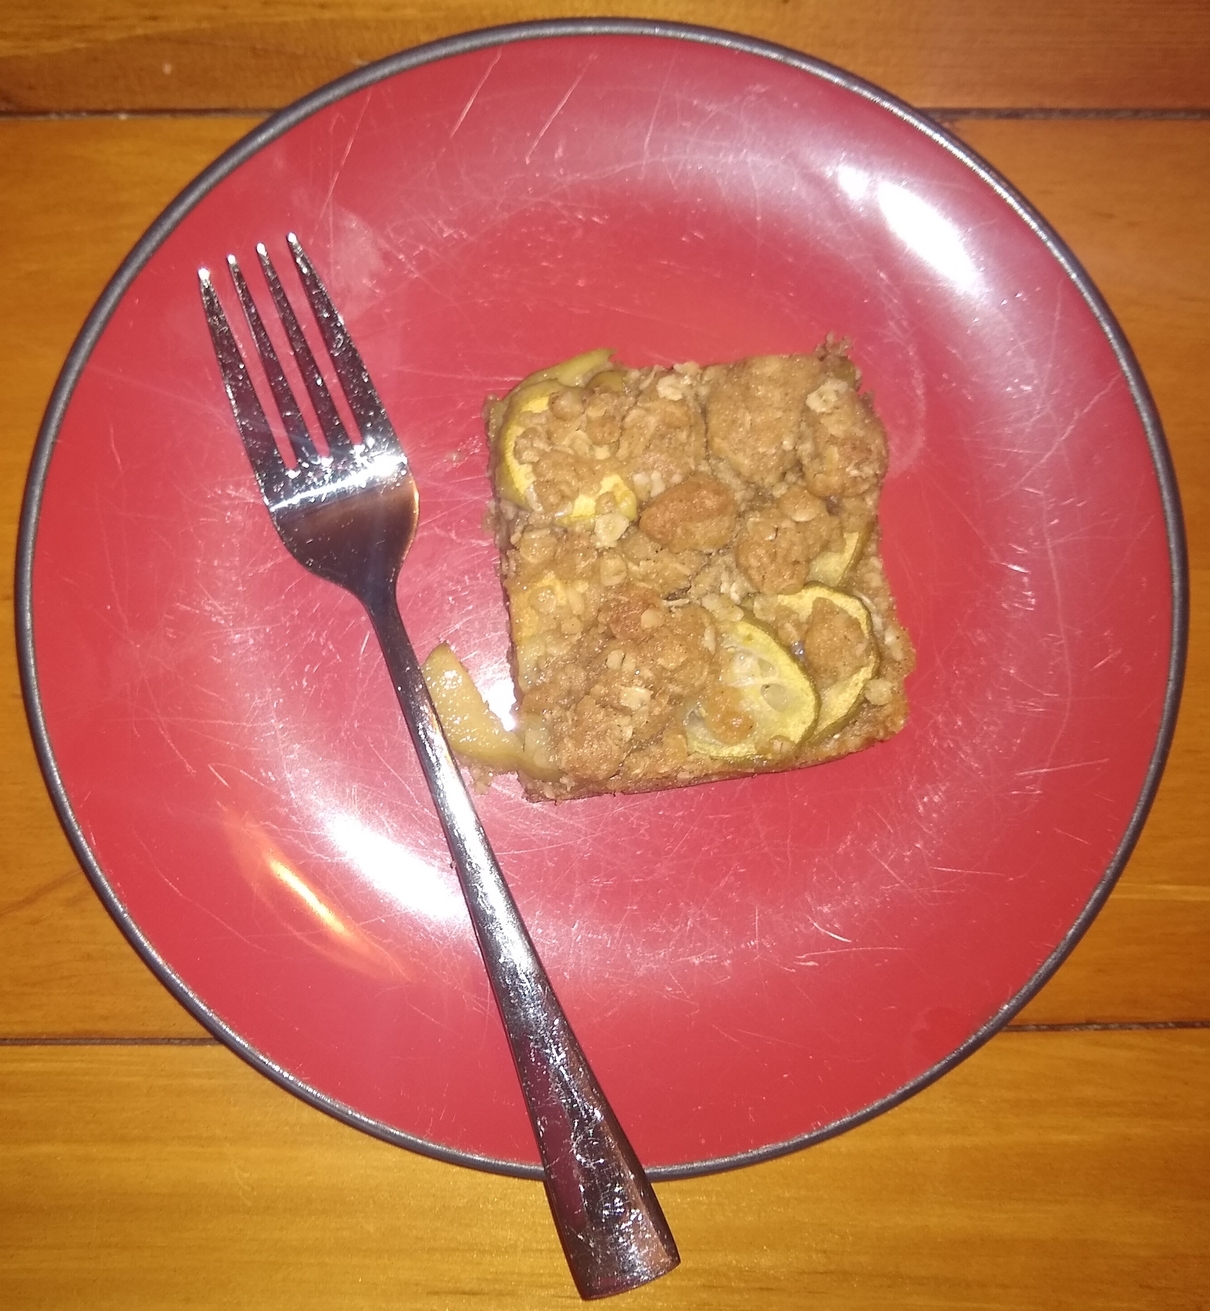
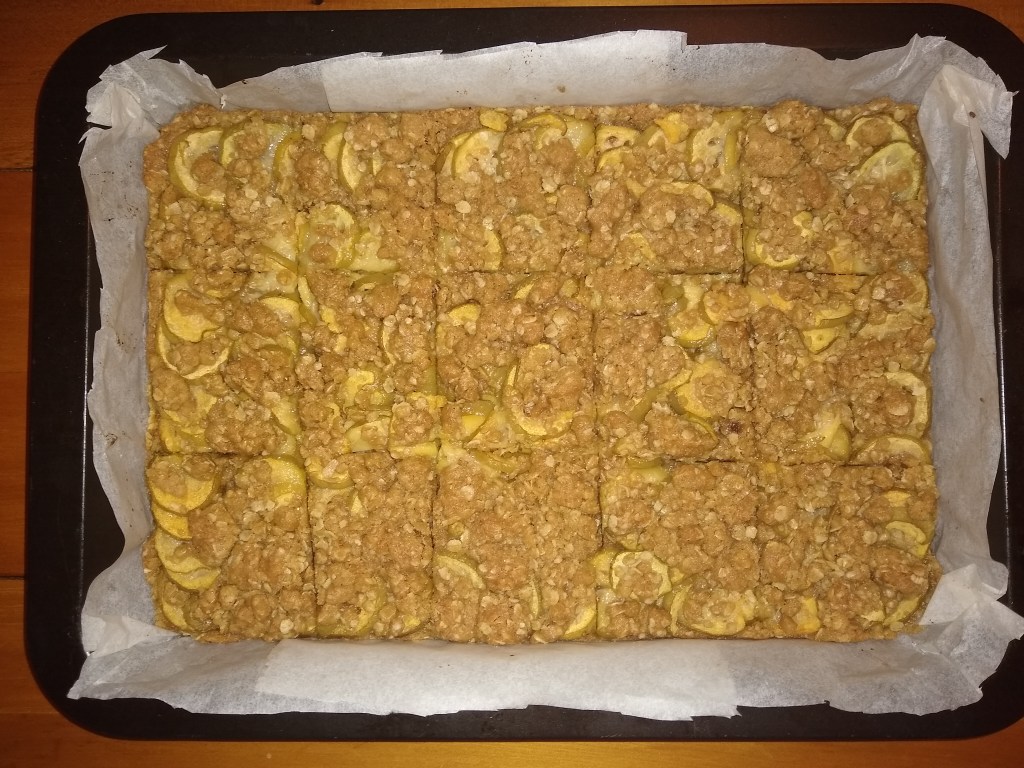
Is it a snack or is it dessert? Yes! This feijoa recipe has been adapted from this apple crumble slice recipe. I have once again left the skins on the feijoas, to ensure optimal feijoainess, but you can peel them if you prefer.
Ingredients:
1 1/4 cups plain flour 1 1/4 cups rolled oats 1/2 teaspoon salt 1/2 teaspoon bicarbonate of soda 1 cup brown sugar, packed 1 teaspoon cardamom 1 teaspoon cinnamon 1 teaspoon ground nutmeg 170g butter, melted 1 teaspoon vanilla extract about 10 small feijoas, skin on, sliced
Instructions:
Preheat oven to 170°C (338°F).
Combine dry ingredients in a bowl and mix to combine. Make a well in the centre, and add in melted butter and vanilla extract. Mix well to combine.
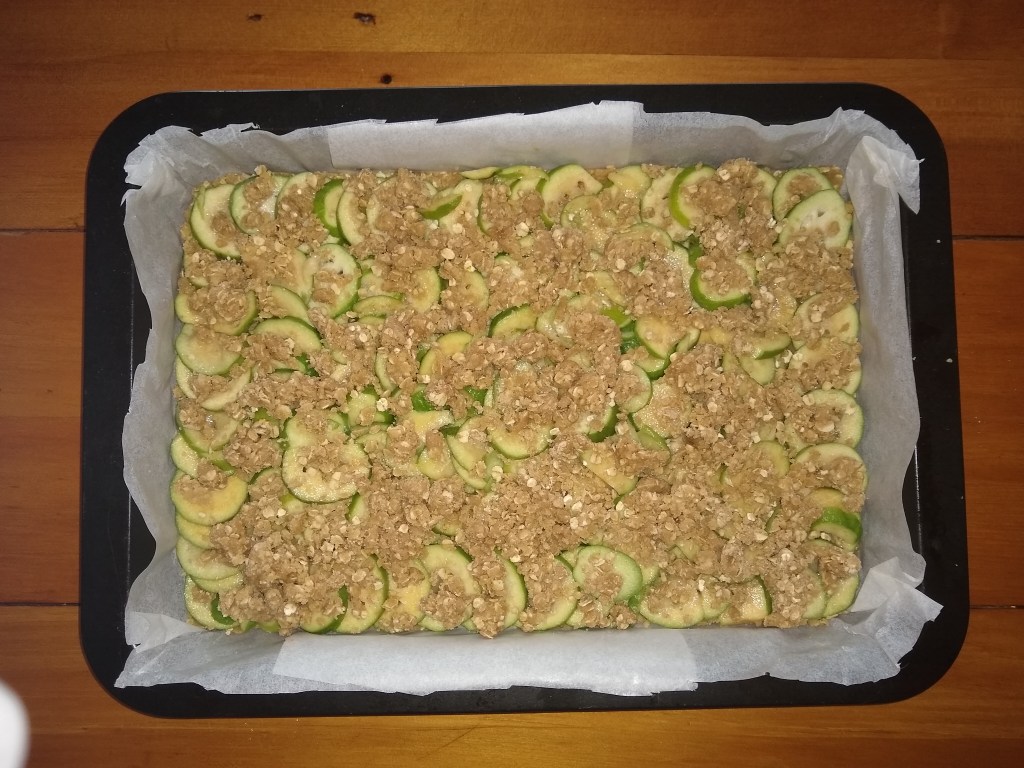
Take about 2/3 of the mixture and press into a baking tray lined with baking paper. Arrange the sliced feijoas over the top. Sprinkle the feijoas with the remaining mixture.
Before cooking
Bake at 170°C (338°F) for 25 minutes, or until lightly golden.
Allow to cool, then cut and remove from tray.
Ready to eat
What the kids can do:
Hand washing: Don’t forget to get the kids (and grownups too of course) to wash their hands before you start. Little hands always seem to end up touching everything, including the ingredients. This is extra important given the current Covid-19 situation. For good 20 second hand wash, have them sing “happy birthday to me” twice.
Mixing the ingredients: My daughter helped mix all the ingredients. The biggest messes seen to happen when sifting and mixing dry ingredients with the kids. A great tip from reader Dana M is to put a towel down underneath, which catches any stray ingredients for easy cleaning.
Feijoas: We washed the feijoas. Miss 5 cut the flower ends off with a butter knife (for safety) and we put them through the food processor to slice them. We then arranged the slices across the top of the base. Once covered with feijoas, we crumbled the last 1/3 of base mix over the top.
This recipe is great on its own, and even better heated up a bit with a scoop of icecream for dessert. Enjoy.
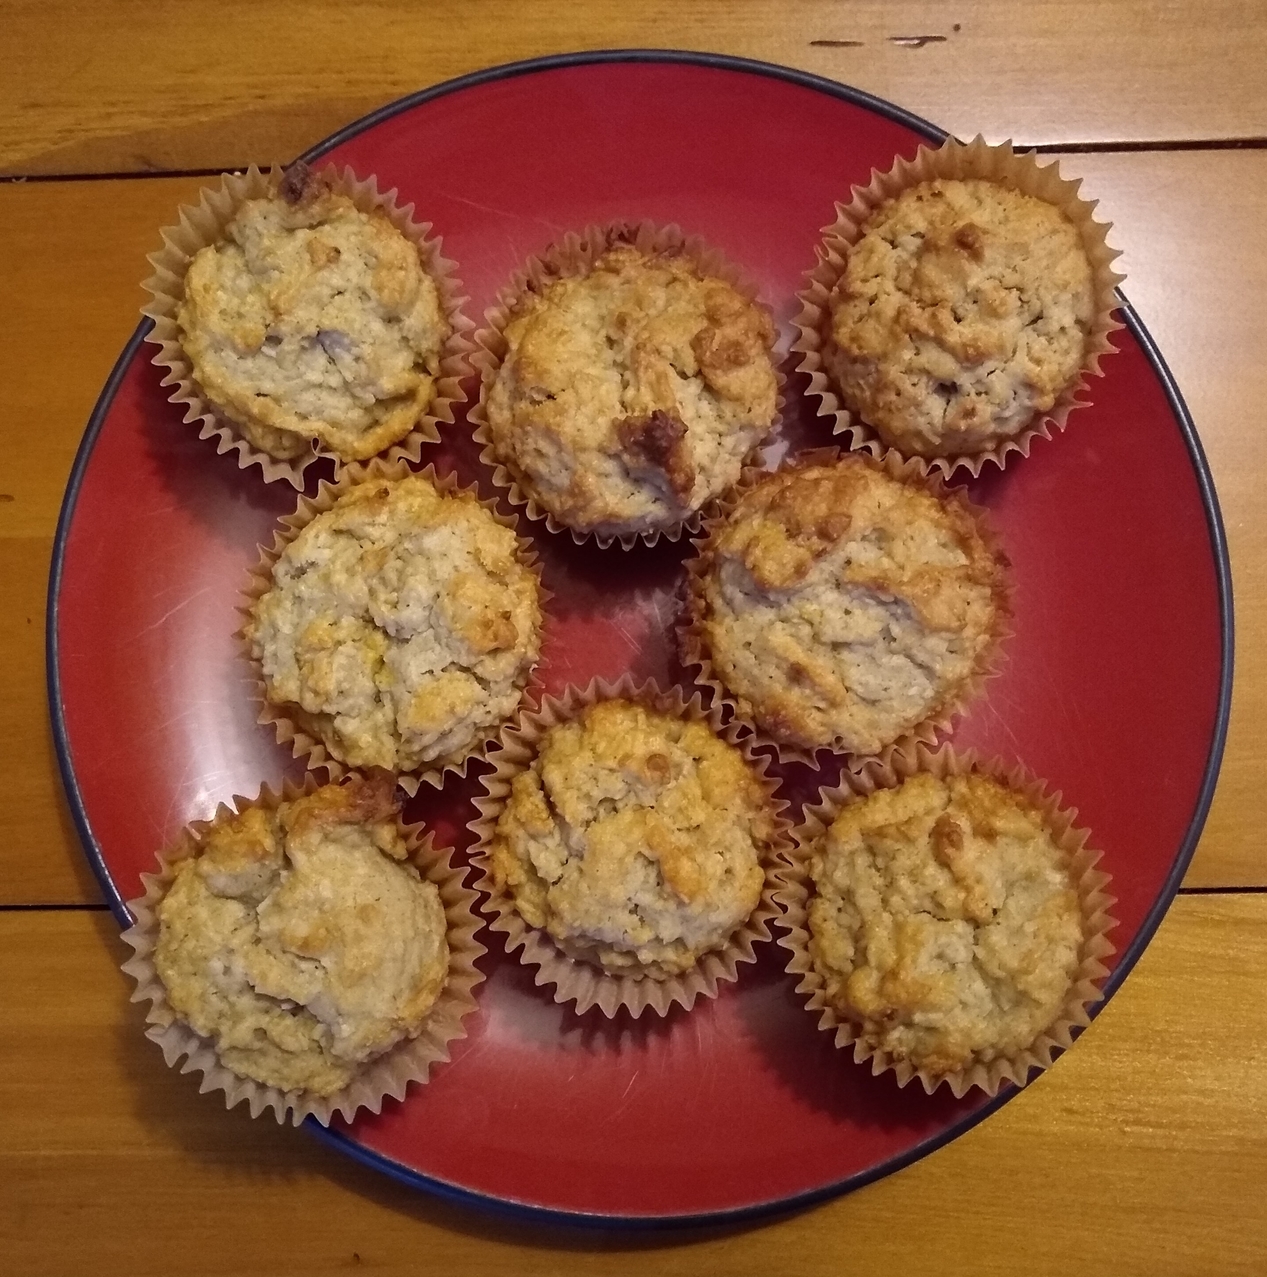
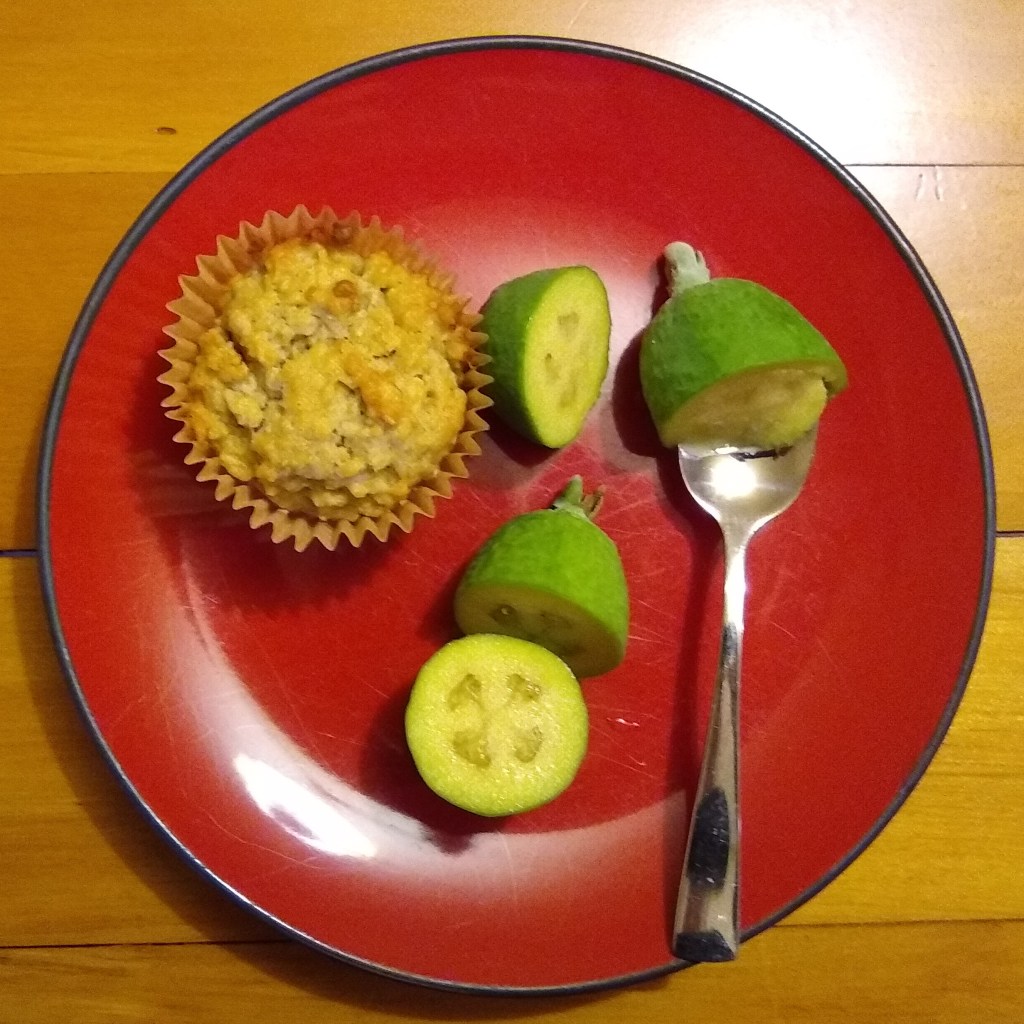
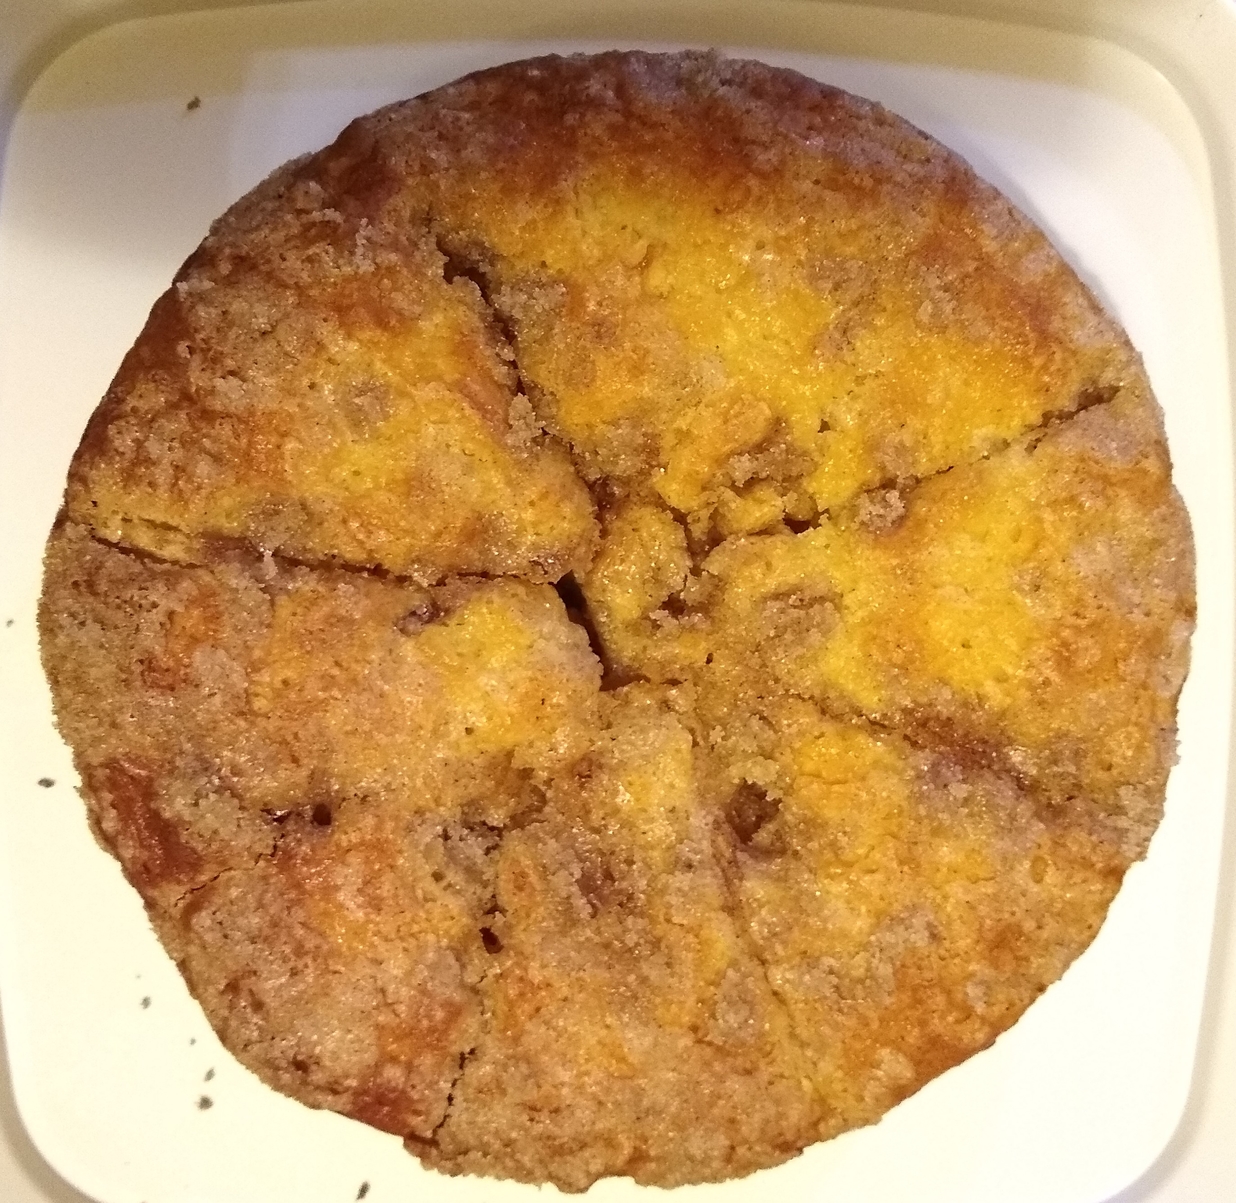
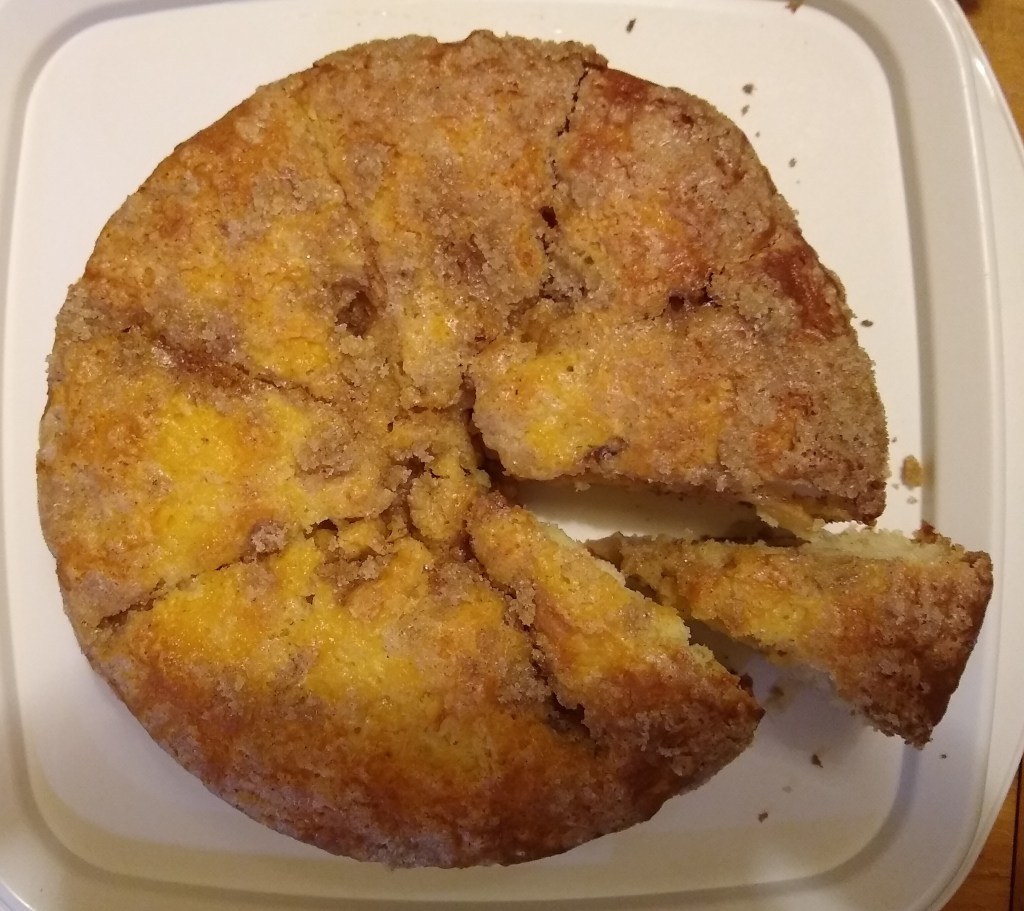
Another feijoa recipe this week, to try to use up some of our feijoas from our trees. We also used a lemon from our lemon tree, which has lots of fruit that is just turning yellow. We made some yummy feijoa, lemon and coconut muffins based on this recipe.
Ingredients:
6 feijoas, peeled Juice and zest of 1 lemon 100g butter, melted 3/4 cup caster sugar 1 free-range egg 1 teaspoon vanilla essence 1 1/2 cups self-raising flour 1 teaspoon baking soda 1/2 teaspoon cinnamon 1/2 teaspoon cardamom 1/2 teaspoon nutmeg 1/2 teaspoon ground cloves Pinch of salt 1 cup desiccated coconut
Instructions:
Preheat oven to 190°C (374°F).
Combine peeled and roughly chopped feijoas, lemon juice and zest, melted butter, caster sugar, free-range egg and vanilla essence in a food processor. Blend until combined.
Sift flour, baking soda, spices and salt into a large bowl. Add 1 cup of desiccated coconut. Mix to combine, and make a well in the centre.
Add the wet ingredients to the dry ones. Fold ingredients together until combined. Distribute into cupcake cases in a 12-hole muffin tray.
Bake at 190°C (374°F) for 20 minutes or until they bounce back when touched.
What the kids can do:
Hand washing: Don’t forget to get the kids (and grownups too of course) to wash their hands before you start. Little hands always seem to end up touching everything, including the ingredients. This is extra important given the current Covid-19 situation. For good 20 second hand wash, have them sing “happy birthday to me” twice.
Feijoas: I peel the feijoas and Miss 5 chops them up with a butter knife (for safety). Chopping them up is not strictly necessary, but she likes to do that job.
Eggs: Pro tip for breaking eggs with a 4 year old, break eggs into a separate glass bowl before adding to your other ingredients. That way you can see and pick out any bits of shell before they are added in by mistake. I like to use free range eggs, because it is kinder to the chickens, and they also taste better. Bear in mind that raw eggs can carry Salmonella so wash little hands if they end up the raw egg. I also don’t recommend eating raw cake batter, just in case.
Mixing the ingredients: My daughter helped mix all the ingredients. The biggest messes seen to happen when sifting and mixing dry ingredients with the kids. A great tip from reader Dana M is to put a towel down underneath, which catches any stray ingredients for easy cleaning. When folding wet into dry ingredients, you want to mix thoroughly, but not too much or the cake will go flat. This usually requires the grown up to either finish off the mixing and/or intervene before things are mixed too much.
Cupcake cases: Miss 5 likes to add the cupcake cases to the muffin tray and then spoon in the ingredients. She is getting pretty good at it with minimal mess made and only a minimum amount of batter redistribution required on my part.
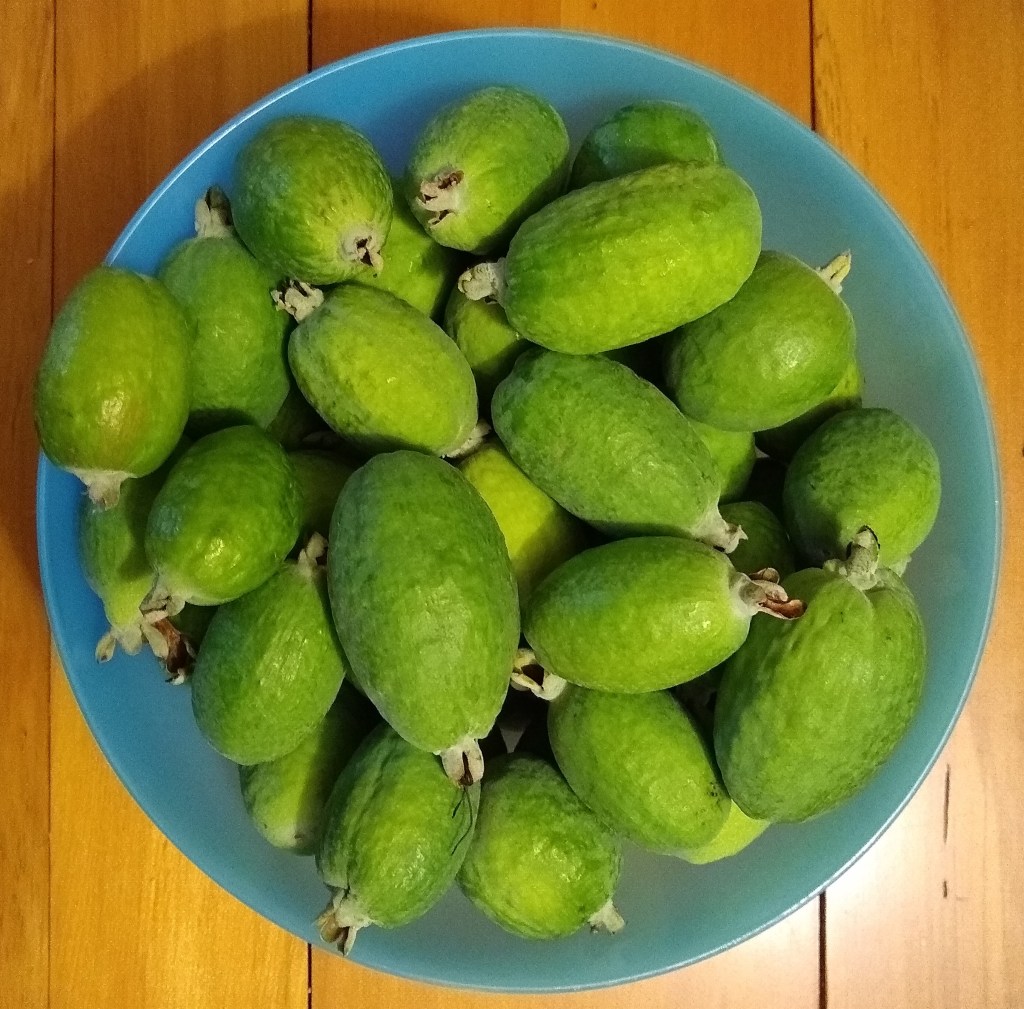
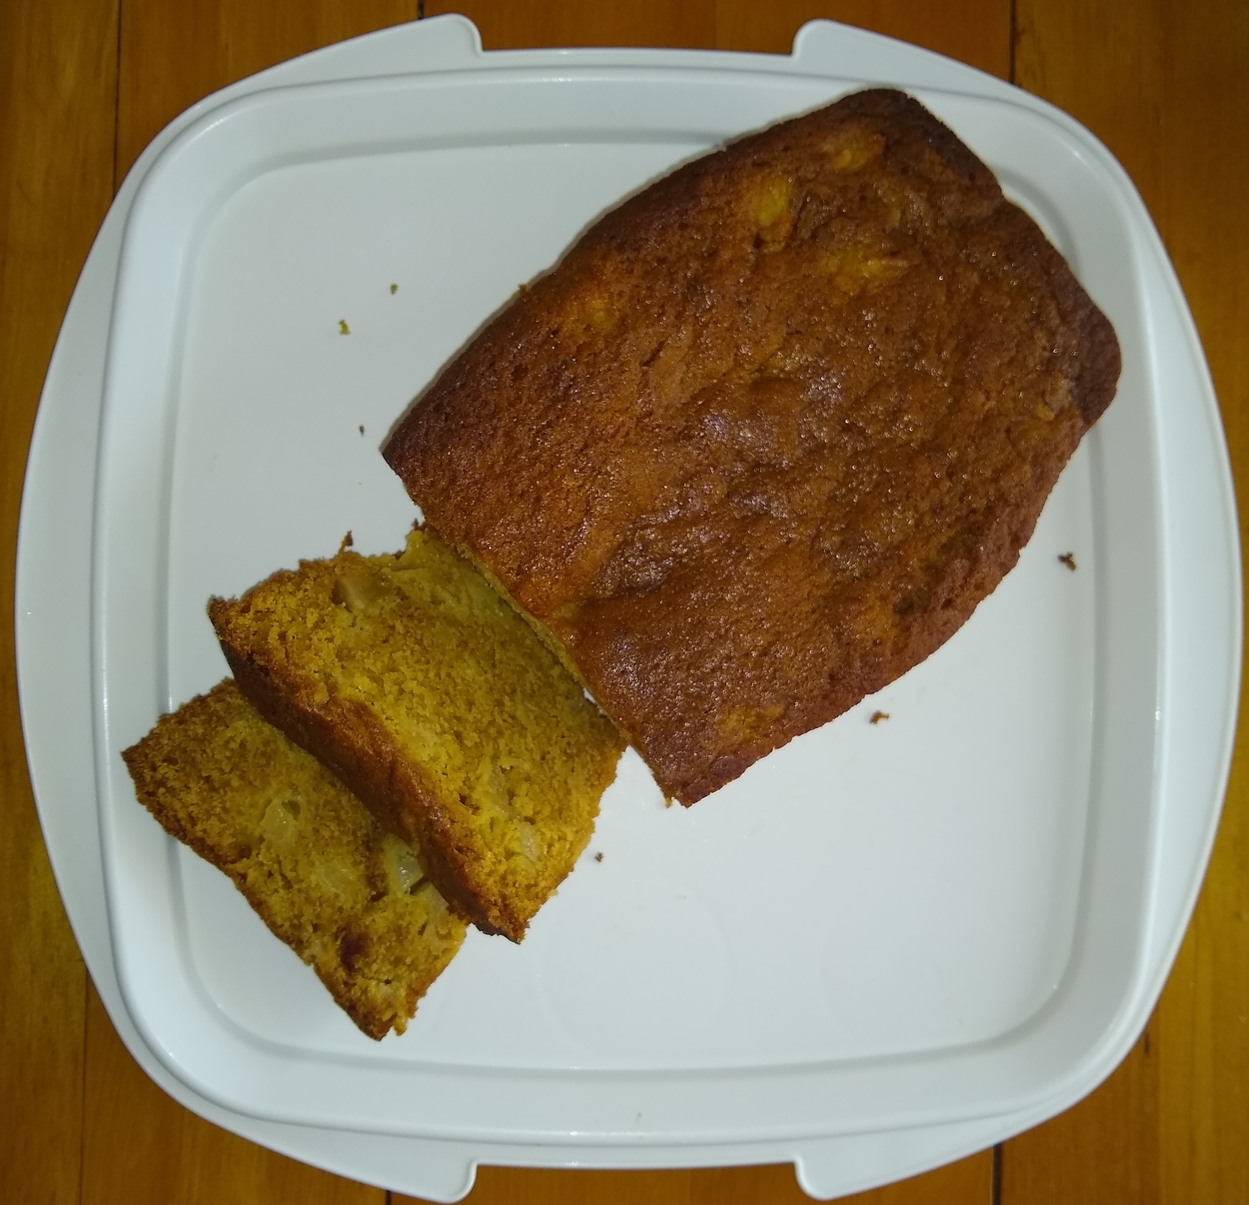
Kiwi’s love their feijoas, but we had trouble getting hold of them in other parts of the world. So if you don’t know what a feijoa is, I recommend you see if you can track some down. These are an awesome little autumn fruit, and we have two trees in our back garden which are currently dropping heaps of fruit. If you like feijoas you will like this cake. The trick to getting a really feijoaey (is that a word?) flavour is to grate the feijoas, skin and all into the cake. Cooking seems to reduce the feijoa flavour a bit. But if this weirds you out a bit (people don’t normally eat the skins) you can peel the feijoas before grating. This recipe is based on the Edmond’s Cookery Book Banana Cake recipe.
Ingredients:
Cake:
125 g butter 3/4 cup sugar 2 free-range eggs or 125g pot of Greek yoghurt (e.g. for egg allergies) 6 feijoas, washed and flower ends cut off 2 cups self-raising flour 1 teaspoon of baking soda 1/4 cup hot trim milk
Lemon butter icing:
2 cups of icing sugar a knob of butter juice and rind of 1 lemon
Instructions:
Preheat oven to 180°C (356°F).
Cream together butter and sugar in a food processor until light and fluffy. Add free-ranges eggs one at a time. Replace the blade in the food processor with the grating attachment and grate the 6 feijoas into the wet ingredients.
Sieve the self-raising flour into a large bowl and make a well in the centre.
Boil 1/4 cup of milk in the microwave and add 1 teaspoon of baking soda to it. It will froth up.
Pour the frothy milk and the other wet ingredients into the well in the flour. Fold to combine ingredients. Pour mixture into a greased cake tin.
Bake at 180°C (356°F) for about 50 minutes. Allow cake to cool.
Combine ingredients for icing. Heat in the microwave to soften butter and mix until combined. Spread over cake.
What the kids can do:
Hand washing: Don’t forget to get the kids (and grownups too of course) to wash their hands before you start. Little hands always seem to end up touching everything, including the ingredients. This is extra important given the current Covid-19 situation. For good 20 second hand wash, have them sing “happy birthday to me” twice.
Eggs: Pro tip for breaking eggs with a 4 year old, break eggs into a separate glass bowl before adding to your other ingredients. That way you can see and pick out any bits of shell before they are added in by mistake. I like to use free range eggs, because it is kinder to the chickens, and they also taste better. Bear in mind that raw eggs can carry Salmonella so wash little hands if they end up the raw egg. I also don’t recommend eating raw cake batter, just in case.
Mixing the ingredients: My daughter helped mix all the ingredients. The biggest messes seen to happen when sifting and mixing dry ingredients with the kids. A great tip from reader Dana M is to put a towel down underneath, which catches any stray ingredients for easy cleaning. When folding wet into dry ingredients, you want to mix thoroughly, but not too much or the cake will go flat. This usually requires the grown up to either finish off the mixing and/or intervene before things are mixed too much.
Icing the cake: Miss 5 likes to grate the rind of the lemon – keep an eye on it though, because she tends to grate the same spot over and over and you get a lot of pith in there. She also helped spread the icing on the cake, though the help of a grownup was required to ensure it was evenly spread across the whole cake and not just in one direction.
This will be the last pear based recipe for a while, the trees have done their dash for this season. The pears maybe over, but the good news is the feijoa season is now upon us, so you can expect some feijoa based goodies in the near future.
Today’s recipe is slightly adapted from the one found at Adventure Gather Eat. After making this I have decided that I do not use cardamom anywhere near enough.
Ingredients:
Cake:
25 g melted butter 1 cup white sugar 1 free-range egg 1 cup buttermilk 2 cups of self-raising flour 1/2 teaspoon baking soda pinch of salt 1 teaspoon cardamom 1 pear, pealed, cored and sliced
Topping:
25 g melted butter melted butter 1/2 cup white sugar 1 teaspoon cardamom 1 teaspoon cinnamon
Instructions:
Preheat oven to 180°C (356°F).
Combine melted butter, sugar, free-range egg and buttermilk in a food processor and mix.
Sift together dry cake ingredients. Add wet ingredients and fold together. Transfer to a greased cake tin.
Take pear slices and press vertically into the top of the cake in an aesthetically pleasing pattern.
Combine the ingredients of the topping until in a crumble consistency. Sprinkle over the top of the cake.
Bake at 180°C (356°F) for about 45 minutes, or until cake springs back when touched.
What the kids can do:
Hand washing: Don’t forget to get the kids (and grownups too of course) to wash their hands before you start. Little hands always seem to end up touching everything, including the ingredients. This is extra important given the current Covid-19 situation. For good 20 second hand wash, have them sing “happy birthday to me” twice.
Melting the butter: We do this in the microwave. Miss 5 (as of last Wednesday) likes to press the buttons, I just tell her which ones to push. I get the butter out of the microwave as it is, of course, hot.
Eggs: Pro tip for breaking eggs with a 4 year old, break eggs into a separate glass bowl before adding to your other ingredients. That way you can see and pick out any bits of shell before they are added in by mistake. I like to use free range eggs, because it is kinder to the chickens, and they also taste better. Bear in mind that raw eggs can carry Salmonella so wash little hands if they end up the raw egg. I also don’t recommend eating raw cake batter, just in case.
Mixing the ingredients: My daughter helped mix all the ingredients. The biggest messes seen to happen when sifting and mixing dry ingredients with the kids. A great tip from reader Dana M is to put a towel down underneath, which catches any stray ingredients for easy cleaning. When folding wet into dry ingredients, you want to mix thoroughly, but not too much or the cake will go flat. This usually requires the grown up to either finish off the mixing and/or intervene before things are mixed too much.
Cutting the pears: I pealed, cored and cut the pears. Miss 5 helped push the pear slices into the cake, and ate the leftover slices, of course. As the cake rose, the slices of pear disappeared into the cake. But it did come out looking quite pretty.
Thanks to Rachel for recommending this recipe. I have adapted it a little, mainly to make up for a lack of fresh ginger.
Ingredients:
200g butter 3/4 cup brown sugar packed 4 tablespoons golden syrup 1 tsp pure vanilla extract 1/2 cup trim milk 1 free-range egg 4 small pears or 2 medium pears, diced 2 cups self raising flour 2 Tbsp ground ginger 1/2 tsp baking soda 2 tsp ground cardamom ½ tsp salt
Instructions:
Preheat oven to 160°C (320°F).
Add butter, brown sugar, golden syrup and vanilla to a pot. Heat gently on stove until melted and take off heat.
Whisk to combine milk and free-range egg. Add to melted butter and sugar above and mix to combine.
Peal, core and dice the pears, and add to the wet ingredients.
Sieve dry ingredients together, then fold in wet ingredients and pears. Pour mixture into a greased loaf tin and bake at 160°C for about 1 hour, or until loaf springs back when touched.
What the kids can do:
Hand washing: Don’t forget to get the kids (and grownups too of course) to wash their hands before you start. Little hands always seem to end up touching everything, including the ingredients. This is extra important given the current Covid-19 situation. For good 20 second hand wash, have them sing “happy birthday to me” twice.
Melting on the stove: Miss 4 wanted to stir the ingredients on the stove. Careful to let her know not to touch the element, and keeping an eye on the situation, I let her do the stirring.
Eggs: Pro tip for breaking eggs with a 4 year old, break eggs into a separate glass bowl before adding to your other ingredients. That way you can see and pick out any bits of shell before they are added in by mistake. I like to use free range eggs, because it is kinder to the chickens, and they also taste better. Bear in mind that raw eggs can carry Salmonella so wash little hands if they end up the raw egg. I also don’t recommend eating raw cake batter, just in case.
Mixing the ingredients: My daughter (age 4) helped mix all the ingredients. The biggest messes seen to happen when sifting and mixing dry ingredients with the kids. A great tip from reader Dana M is to put a towel down underneath, which catches any stray ingredients for easy cleaning. When folding wet into dry ingredients, you want to mix thoroughly, but not too much or the loaf will go flat. This usually requires the grown up to either finish off the mixing and/or intervene before things are mixed too much.