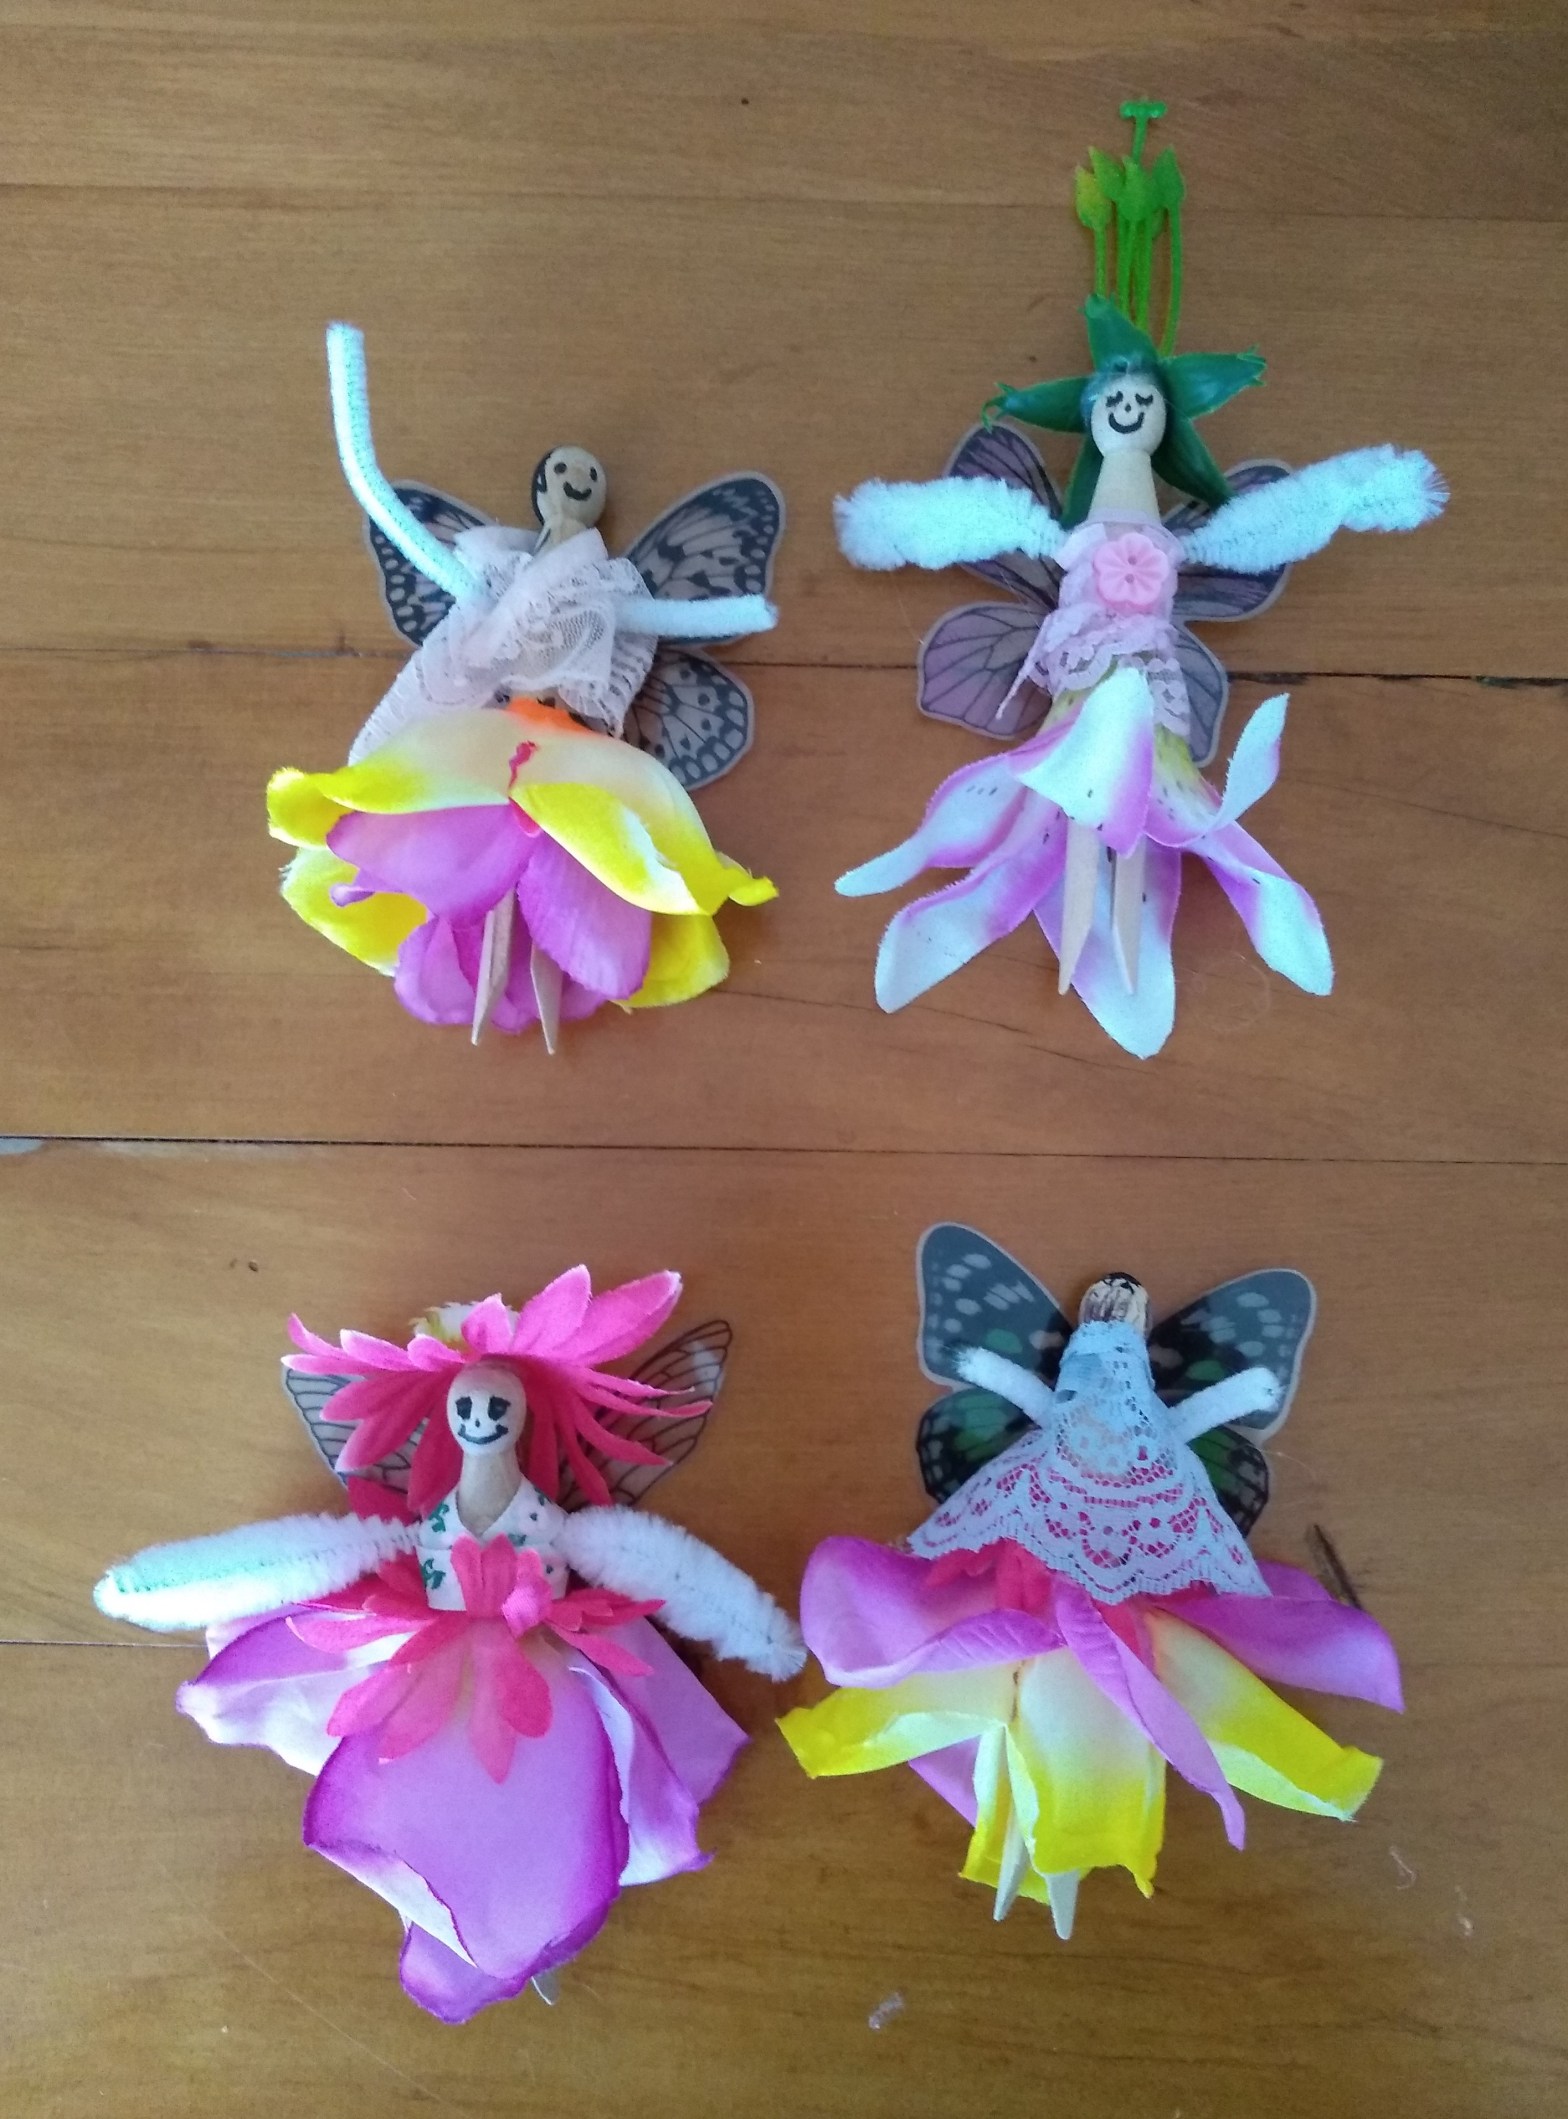
Miss 5 had a friend over to play last weekend, and we all did this project together.
Things you will need:
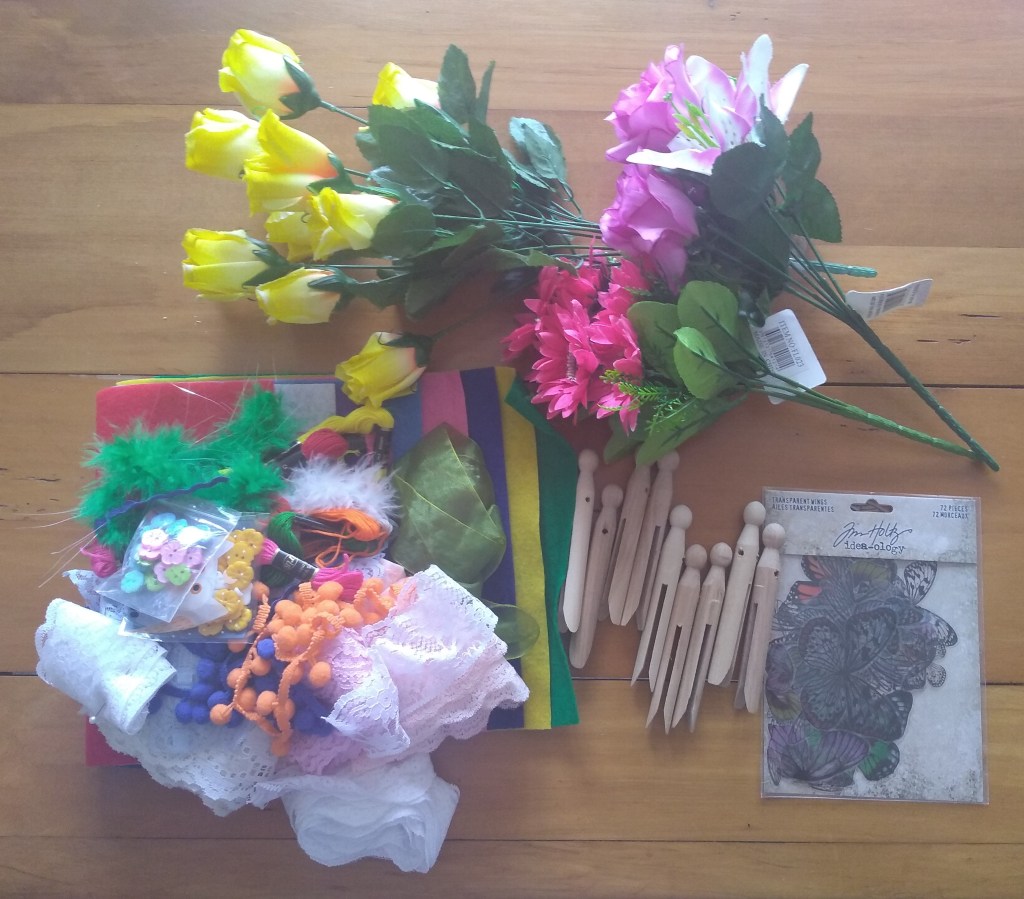
Old fashioned wooden clothes pegs Cheap fake flowers Pipe cleaners Transparent plastic insect wings (Jim Holtz idea-ology brand) Various embellishments (lace, trims, buttons, etc…) Hot glue gun and glue Drill and drill bit
Instructions:
Drill a hole through the clothes pegs perpendicular to the ‘legs’ to fit the pipe cleaner ‘arms’ through. Disassemble some fake flowers, so you can use the parts to make fairy dresses and hats. You may need to enlarge the hole in the middle to fit over the peg. Attach to the clothes peg fairy using hot glue. Add embellishments to complete the look. Draw on a face and hair if desired.
What the kids can do:
A grown-up is needed for drilling holes in pegs, cutting peg sized holes in fake flowers and hot glue application. Kids can make all the choices about which flowers and embelishments to use.
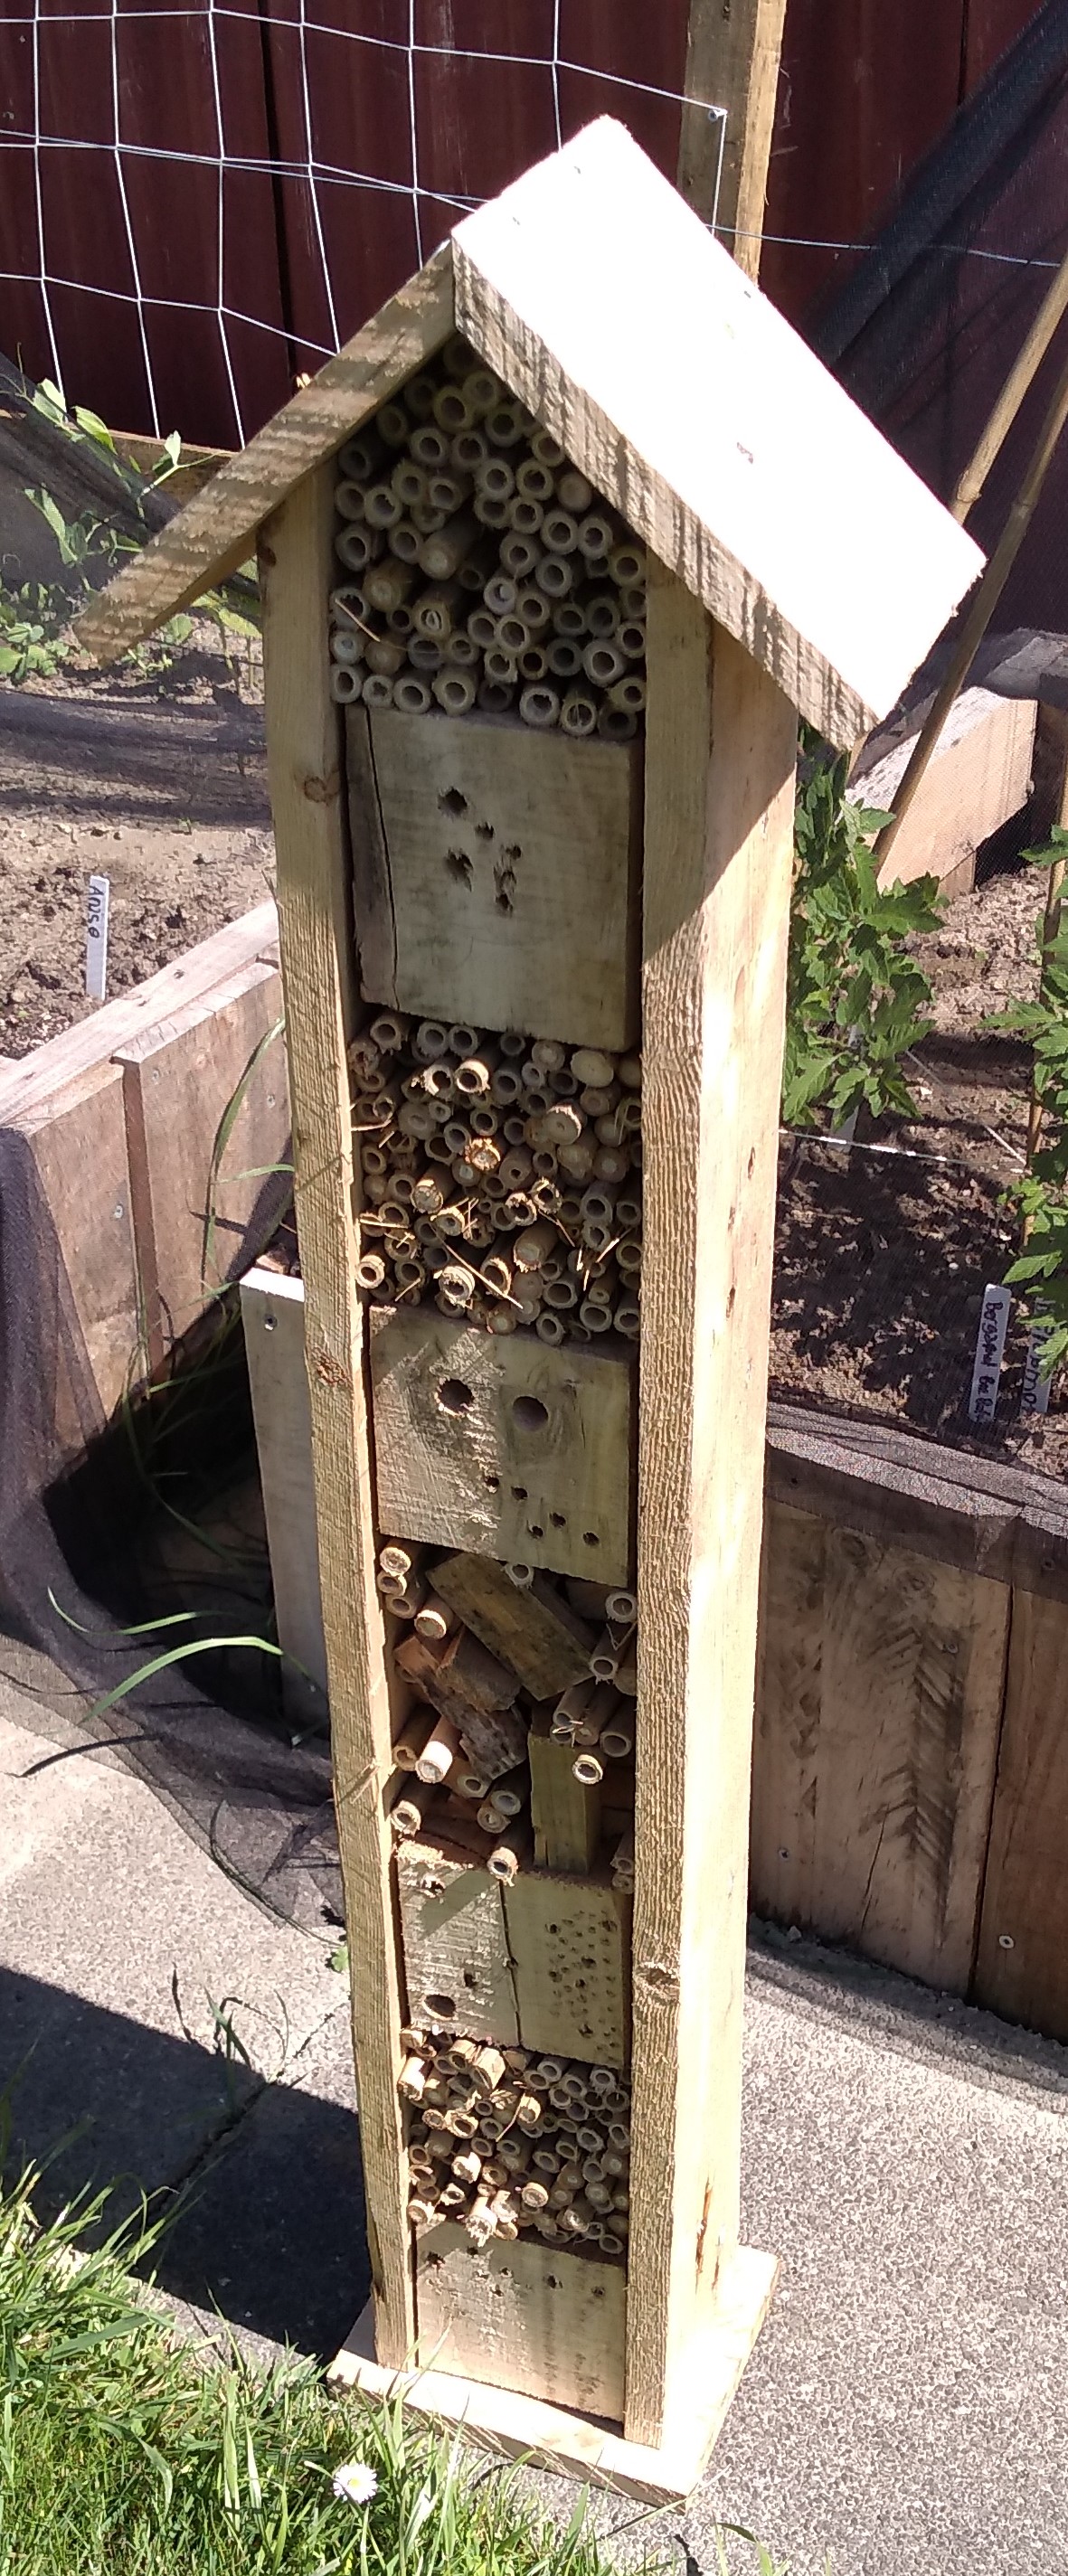
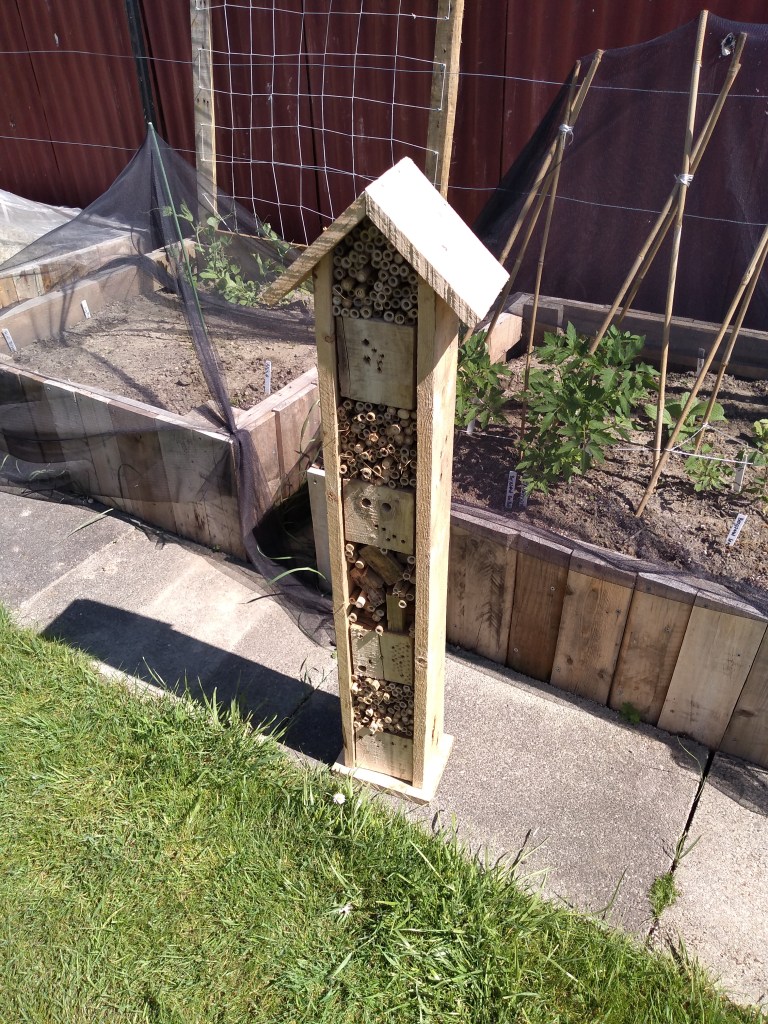
We are starting to get our garden sorted out, and looking for ways to invite beneficial insects into it. So we decided to make a bug hotel, so they would have to somewhere nice to stay.
Things you will need:
Untreated wood – we used wood from old pallets -make sure you use safe ones. Galvanised screws Bamboo stakes Drill and various sized drill bits Drill- or screwdriver Circular saw that cuts at 90° and 45° angles Tape measure
Instructions:
Cut a square base for your bug hotel. Cut 3 sides for your but hotel. The two side should be cut with a 45° angle at the top. The back should be cut with a 45° point at the top. Cut two squares for the roof with one side each at a 45° angle. Predrill holes with a drill and then assemble the bug hotel using screws.
Drill holes in and attach wooden blocks in hotel with screws. Cut bamboo stakes into regular short lengths and insert into bug hotel.
What the kids can do:
I did anything involving power tools, though Miss 5 did help pull the trigger of the drill driver to put some screws in. For the blocks, Miss 5 drew pictures on them and drew dots to indicate where I should drill holes. We ended up with a monster, a cat, a frog, and a pattern. Miss 5 also helped putting the bamboo lengths into their spaces.
Apparently, according to Miss 5, baby brother’s like shark birthday cakes. So that is what we made for a certain someone’s first birthday celebration. Much like Miss 5’s birthday cake, we made an extra large banana cake based on the Edmond’s recipe, covered it with buttercream icing (also based on the Edmond’s recipe).
Ingredients:
Banana cake:
250 g butter, softened 1 1/2 cups white sugar 4 free-range eggs 5 large bananas mashed 1/4 cup milk 2 teaspoons baking soda 4 cups self raising flour
Buttercream icing:
225 g butter, softened 4 cups icing sugar 1 teaspoon vanilla essence yellow food colouring water
Marshmallow fondant:
a handful of white marshmallows icing sugar
Additional items:
1/4 cup apricot jam 1/4 cup boiling water some skittles
Instructions:
Banana cake:
Preheat oven to 180°C (356°F).
Cream butter and sugar together until light and fluffy. Add free-range eggs one at a time, and beat in. Add in mashed banana and combine.
Sift flour into a large bowl, and make a well in the centre.
Boil milk in the microwave and immediately add the baking soda. Stir to froth up.
Pour frothy milk and other wet ingredients into the centre of the dry ingredients and fold together. Pour 2/3 into a round cake tine and the remainder into a large rectangle cake tin (we used an oven roasting tray) lined with baking paper.
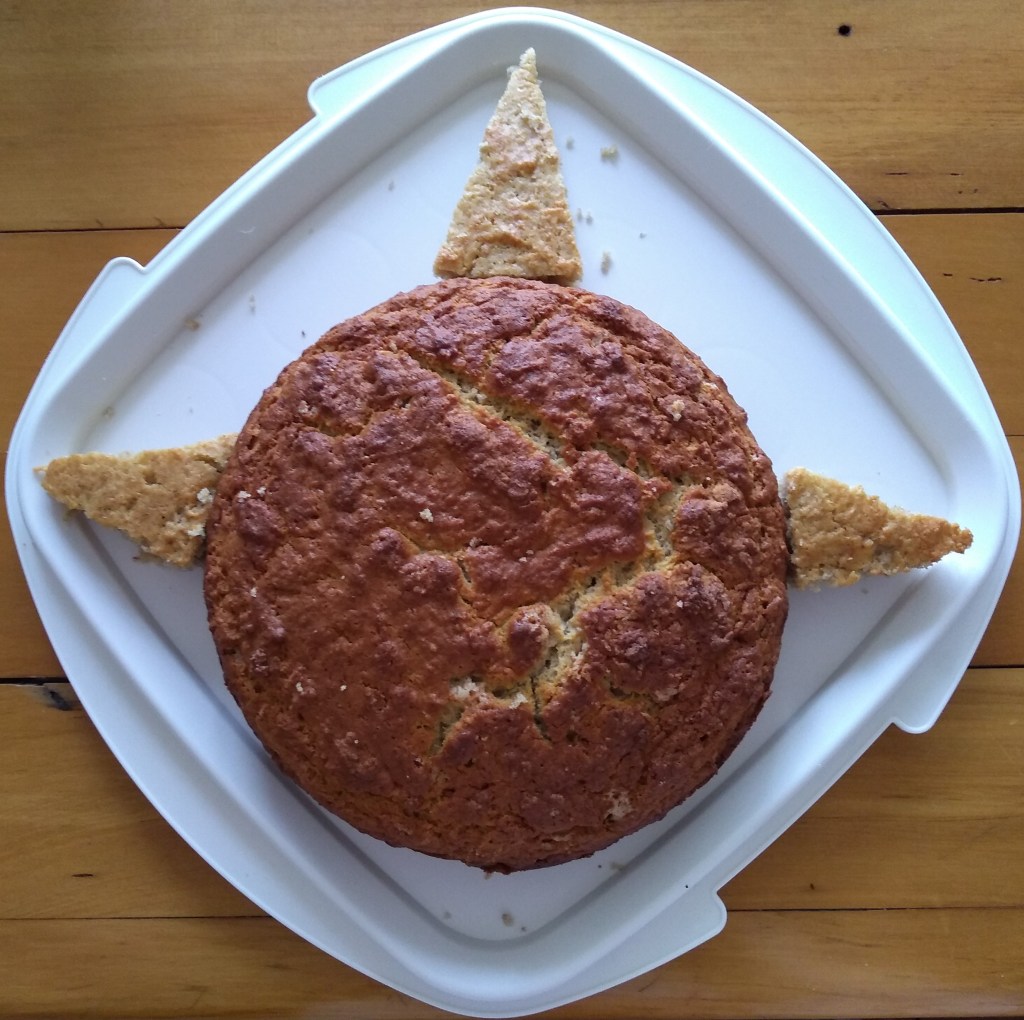
Bake at 180°C (356°F) for about 50 minutes. Allow cake to cool. From the rectangle cake, cut out some triangles for shark fins.
Arrange the cake ‘fins’ around the circular ‘shark’ cake.
Combine 1/4 cup of apricot jam and 1/4 cup of boiling water. Using a pastry brush, brush the cake, especially the cut edges with the mixture. This will reduce the cake crumbling as you apply the icing.
Buttercream icing:
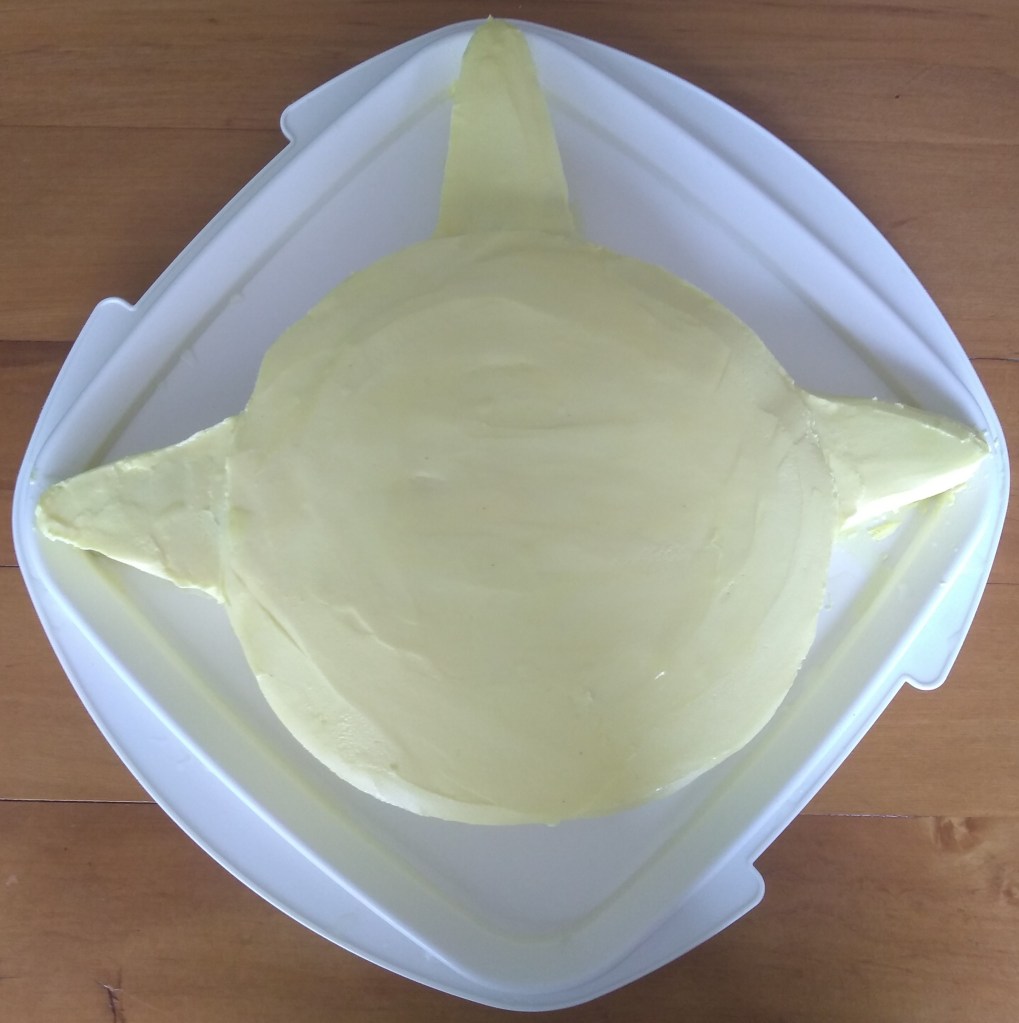
Combine butter and icing sugar and vanilla essence in food processor and beat until combined. Add food colouring and mix until you achieve the desired colour. You can add a little water (or milk) to achieve the desired consistency.
Apply the icing to the cake and smooth over the sides and top until cake is evenly covered with icing. Dipping the spreading knife in boiling water can help to smooth things out nicely. Edges can be cleaned up with a damp cloth.
Marshmallow fondant:
Place the handful of marshmallows in a bowl and microwave until they puff up. Take them out of the microwave, and mix to combine melted marshmallows. Gradually add icing sugar until mixture comes together enough to kneed. Flour a board with icing sugar and kneed fondant until it reaches a good consistency to roll out. Roll our fondant and cut two circles with a cookie cutter and a shark mouth.
Place marshmallow fondant eyes on the cake and add skittle pupils with a little icing on the back to make them stick. I pressed some teeth into the mouth with the back of a knife, then I added a few yellow skittles on the back of the shark to give him some character.
What the kids can do:
Hand washing: Don’t forget to get the kids (and grownups too of course) to wash their hands before you start. Little hands always seem to end up touching everything, including the ingredients. This is extra important given the current Covid-19 situation. For good 20 second hand wash, have them sing “happy birthday to me” twice.
Eggs: Pro tip for breaking eggs with a 5 year old, break eggs into a separate glass bowl before adding to your other ingredients. That way you can see and pick out any bits of shell before they are added in by mistake. I like to use free range eggs, because it is kinder to the chickens, and they also taste better. Bear in mind that raw eggs can carry Salmonella so wash little hands if they end up the raw egg. I also don’t recommend eating raw cake batter, just in case.
Mixing the ingredients: My daughter likes to help using the food processor to mix all the ingredients. Bear in mind that little hands can fit down the shoot of the food processor, so always supervise this step. The biggest messes seen to happen when sifting and mixing dry ingredients with the kids. A great tip from reader Dana M is to put a towel down underneath, which catches any stray ingredients for easy cleaning. When folding wet into dry ingredients, you want to mix thoroughly, but not too much or the cake will go flat. This usually requires the grown up to either finish off the mixing and/or intervene before things are mixed too much.
Mr 1 has yet to figure out blowing out candles, so to her delight, Miss 5 showed him how to do it for next time.
I currently don’t work on Wednesdays, so I have a bit more time in the afternoon to put an evening meal together. This lasagna is an adaptation of the Edmond’s recipe, into which I grate whichever veges I have on hand. It makes enough for at least two meals, so it covers two nights in a row, or you can freeze some for another time.
Ingredients:
Meat Sauce:
2 tablespoon vegetable oil 1 onion, finely chopped 1 teaspoon crushed garlic 500g lean beef mince 4 carrots, grated 4 leaves of silver beet, grated 1 medium sized kūmara (sweet potato), pealed and grated 400g cans tomatoes in juice, chopped 1 jar Macro Organic Pasta Sauce up to 1/2 cup rolled oats
1 packet of whole grain lasagna sheets
Béchamel/Cheese Sauce:
50g butter 1/4 cup plain flour 1 1/2 cup milk 200g cheese grated
Instructions:
Preheat oven to 180°C (356°F).
Meat Sauce:
Heat the oil in a pan, add onion and garlic and cook until onion is clear. Add beef mince and cook until brown. Add in the grated vegetables (these can be exchanged for whatever you have available). Add in the canned tomatoes and the pasta sauce. Cook through. Depending on how sloppy the mixture is once cooked, you can add up to 1/2 a cup of rolled oats to thicken up the mixture.
Béchamel/Cheese Sauce:
Melt the butter over a low heat. Add the flour and whisk together over heat until frothy. Add milk a little at a time, whisking as you go, heat until thickened before adding more milk. Take off the heat and stir in grated cheese. Reserve a little cheese to sprinkle on top of the lasagna.
Assemble the Lasagna:
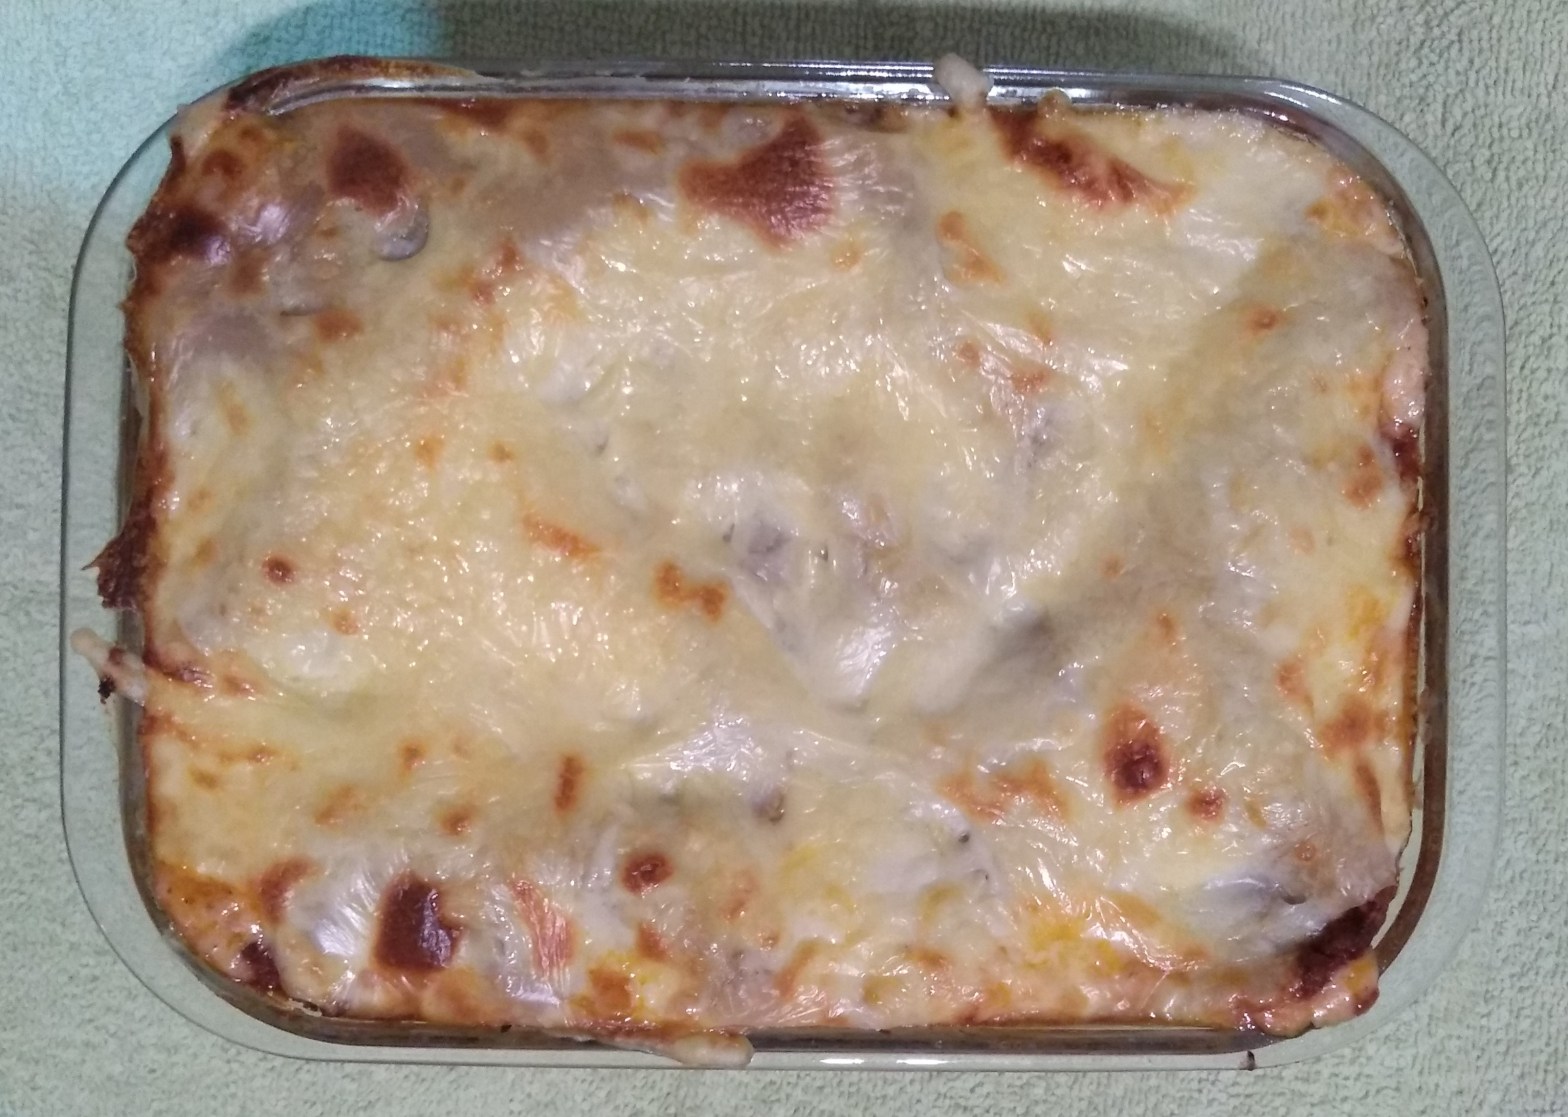
In an oven proof dish, apply a layer of meat sauce, a layer of lasagna pasta and a layer of béchamel/cheese sauce. Repeat this for about 3-4 layers. Top the last layer with the remaining grated cheese and bake at 180°C (356°F) for at least 30 minutes.
What the kids can do:
Hand washing: Don’t forget to get the kids (and grownups too of course) to wash their hands before you start. Little hands always seem to end up touching everything, including the ingredients. This is extra important given the current Covid-19 situation. For good 20 second hand wash, have them sing “happy birthday to me” twice.
Grating the vegetables: My daughter likes to help using the food processor to grate up the whichever vegetables we use. You can use whichever veges are in season, in your fridge, or even your freezer. You don’t have to grate them, but I find kids more likely to eat lasagna with ‘hidden’ vegetables, even if they know they are in there, having helped make it. Bear in mind that little hands can fit down the shoot of the food processor, so always supervise this step. When it comes to the cooking part, I do that . I’m sure when Miss 5 is a little older she can help with that as well.
Assembling the lasagna: We normally do this on the floor, on a towel to catch any messes. Miss spoons the meat sauce. We both put a lasagna sheet on each, breaking off two corners to fit in the dish we use. I pour in the béchamel/cheese sauce and Miss 5 spreads it around. After a sprinkle of cheese, I put it in the oven where it can stay till dinner time.
Eating the lasagna: Currently this is Miss 5’s favorite meal. She will eat everything on her plate, ‘hidden’ veges and all. This is a great way to get a fussy eater to eat their vegetables, and even enjoy them!
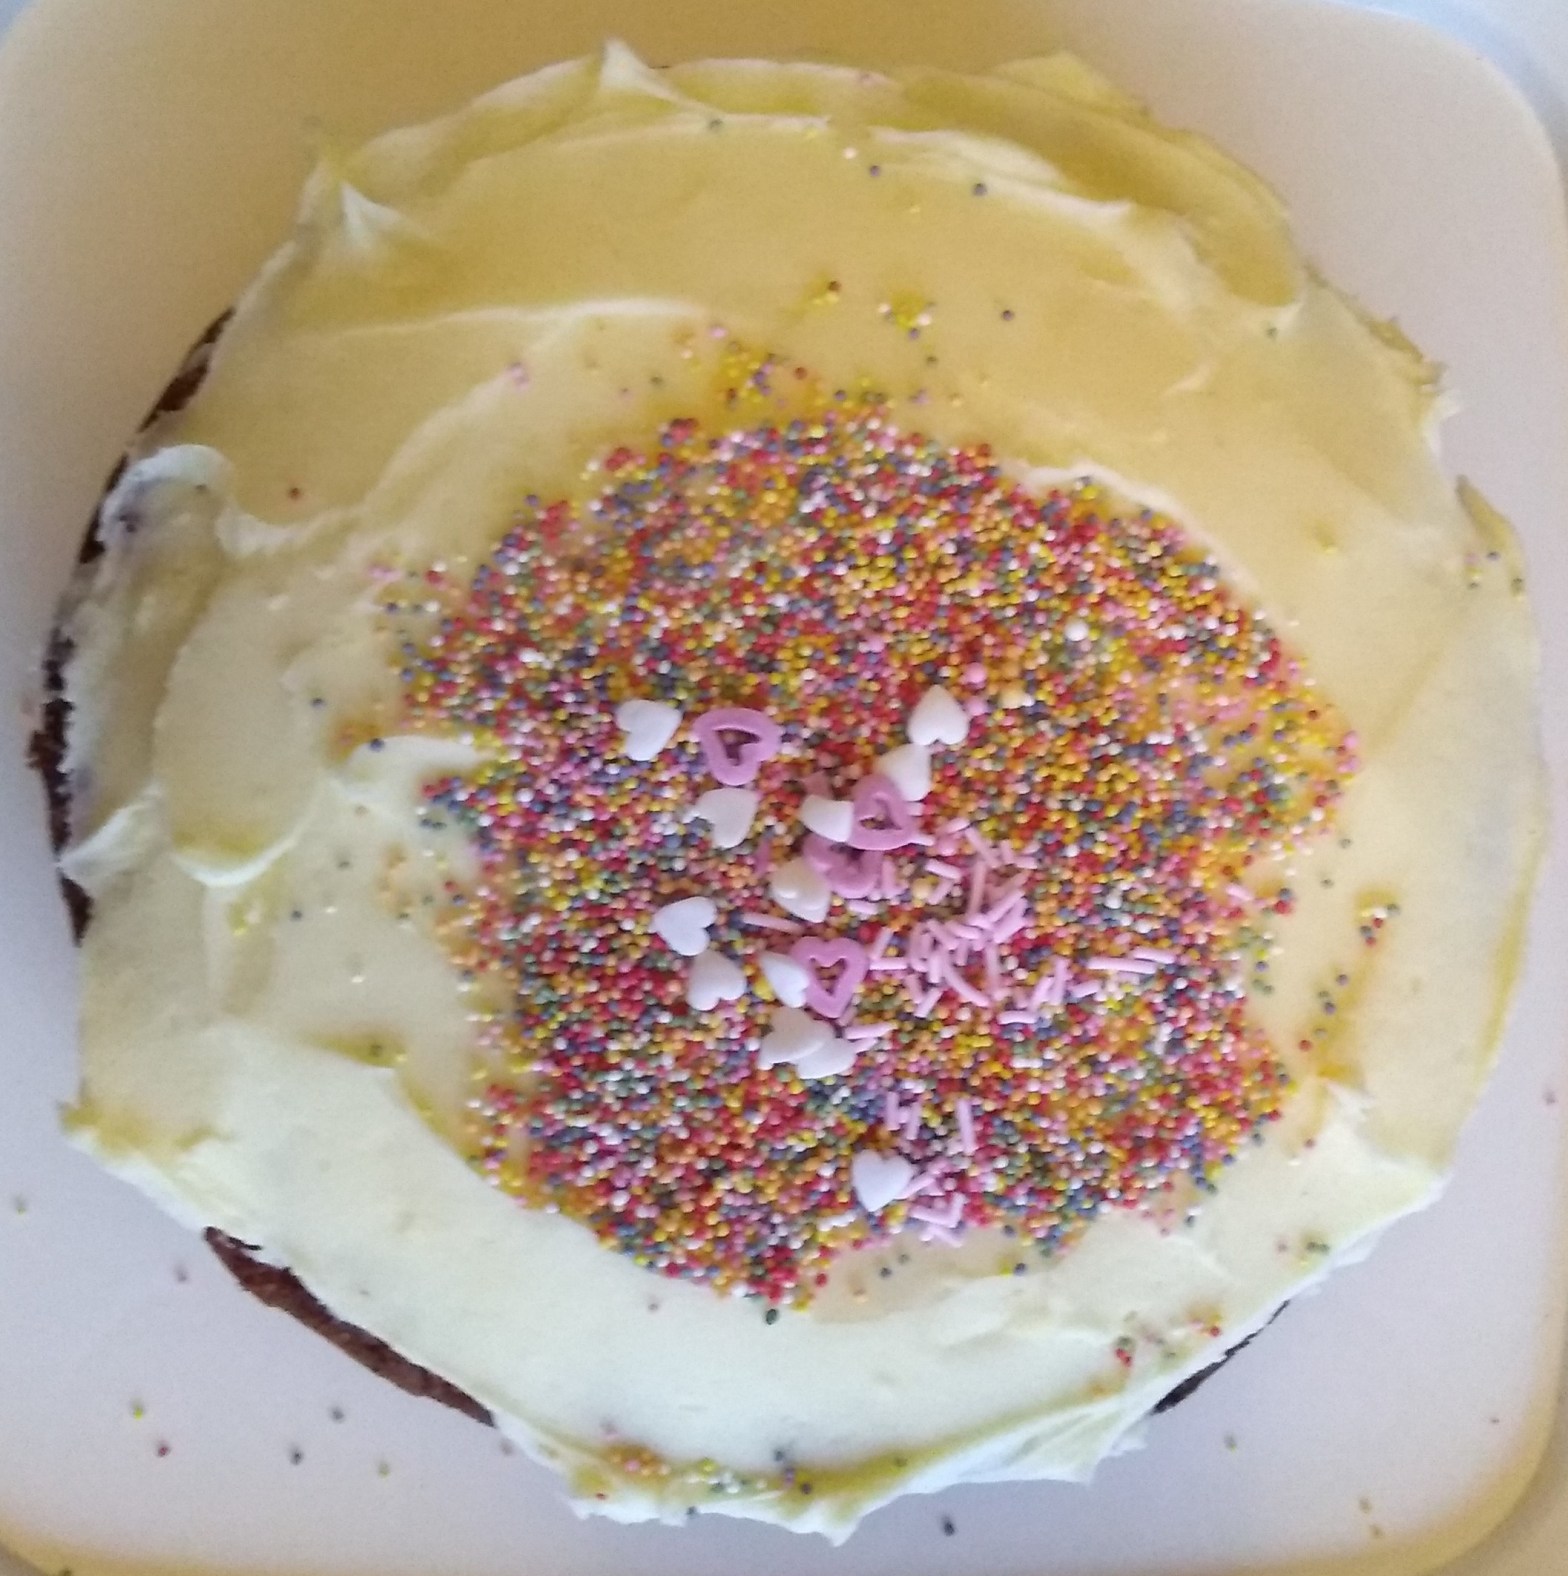
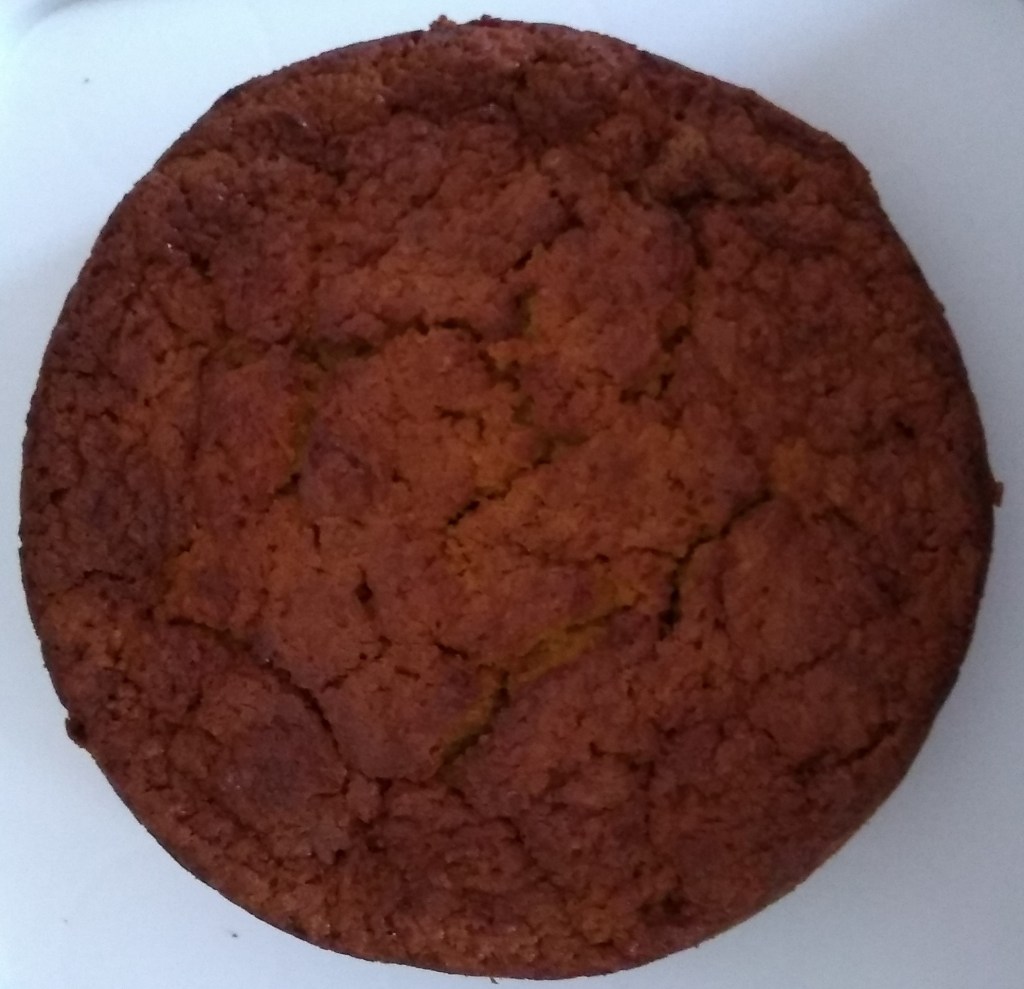
Father’s Day was last Sunday (September 6, 2020), so we made Daddy a special Father’s Day Carrot Cake. We doubled a variation of the Edmond’s carrot cake recipe (the version in my actual Edmond’s book is a bit different again) and made some cream cheese icing topped with the obligatory sprinkles.
Ingredients:
Carrot Cake:
300g butter, softened rind of 1 lemon 1 cup of brown sugar 4 free range eggs 4 medium-small carrots, grated 2 cups of self raising flour 1 teaspoon cinnamon 1 teaspoon nutmeg
Cream Cheese Icing;
50g butter, softened 125g cream cheese 1 cup icing sugar
Instructions:
Carrot Cake:
Preheat the oven to 180°C (356°F).
Cream together butter, lemon rind and sugar until light and fluffy. Beat in the free range eggs one at a time. Grate the carrot using a food processor and place into a bowl. Stir in the other wet ingredients.
Sift self raising flour, cinnamon and nutmeg together and fold in wet ingredients.
Bake at 180°C (356°F) for 1 hour or until cake bounces back when touched. Allow to cool.
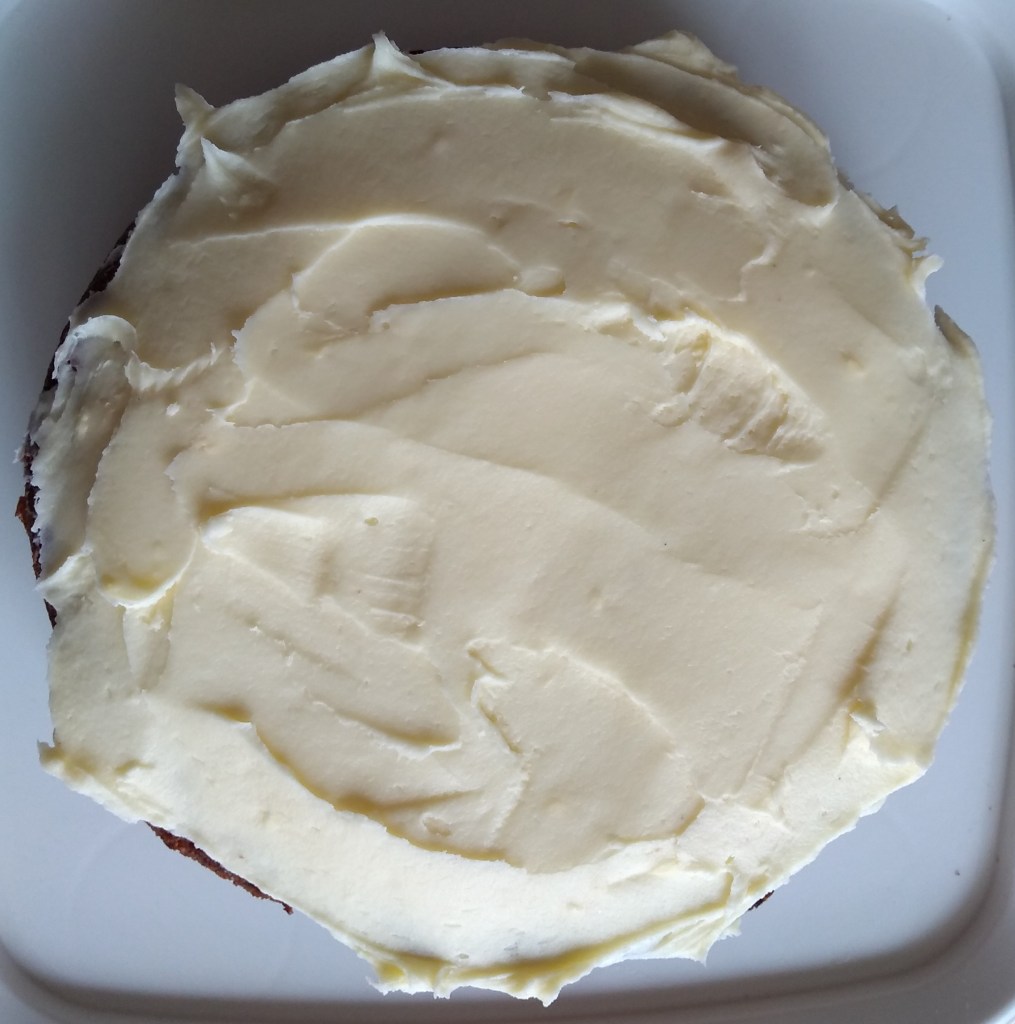
Cream Cheese Icing:
Place all ingredients together in a food processor and beat together until smooth. Spread over the top of the cake. Add sprinkles.
What the kids can do:
Hand washing: Don’t forget to get the kids (and grownups too of course) to wash their hands before you start. Little hands always seem to end up touching everything, including the ingredients. This is extra important given the current Covid-19 situation. For good 20 second hand wash, have them sing “happy birthday to me” twice.
Eggs: Pro tip for breaking eggs with a 5 year old, break eggs into a separate glass bowl before adding to your other ingredients. That way you can see and pick out any bits of shell before they are added in by mistake. I like to use free range eggs, because it is kinder to the chickens, and they also taste better. Bear in mind that raw eggs can carry Salmonella so wash little hands if they end up the raw egg. I also don’t recommend eating raw cake batter, just in case.
Mixing the ingredients: My daughter likes to help using the food processor to grate the carrot and mix all the ingredients. Bear in mind that little hands can fit down the shoot of the food processor, so always supervise this step.. The biggest messes seem to happen when sifting and mixing dry ingredients with the kids. A great tip from reader Dana M is to put a towel down underneath, which catches any stray ingredients for easy cleaning. When folding wet into dry ingredients, you want to mix thoroughly, but not too much or the cake will go flat. This usually requires the grown up to either finish off the mixing and/or intervene before things are mixed too much.
Icing the cake: Miss 5 spread the icing on the cake, I just tidied it up a bit. It was Miss 5 who insisted on, and liberally applied the sprinkles.
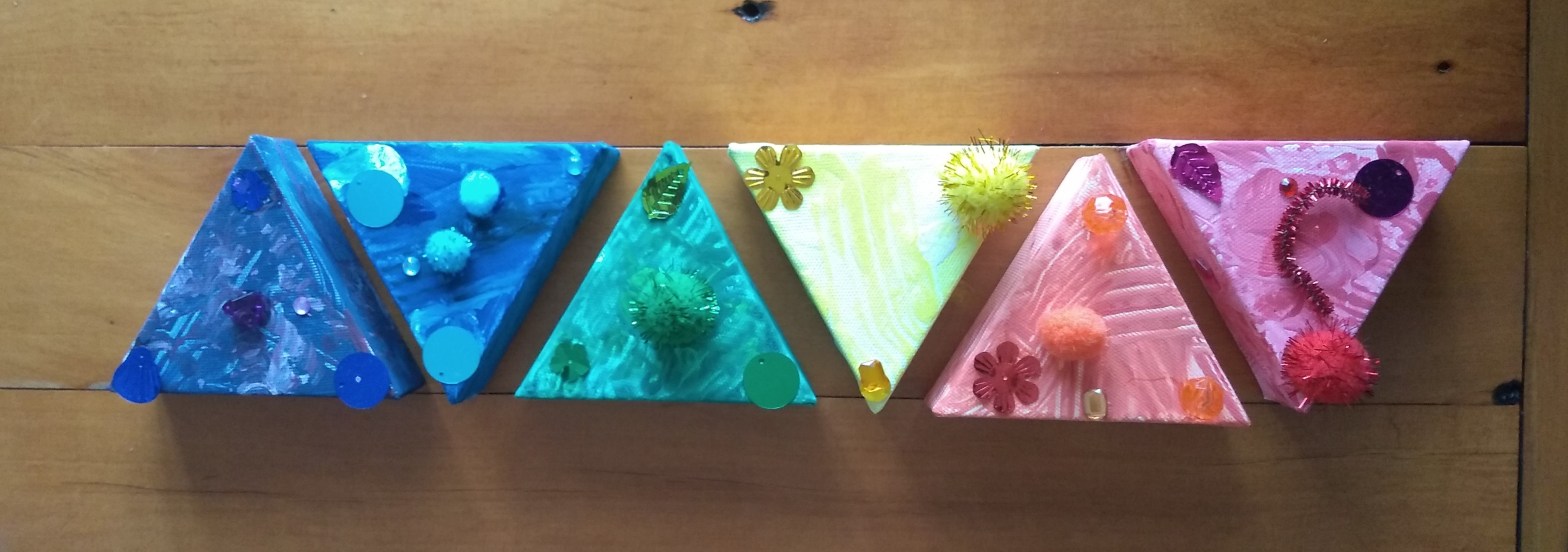
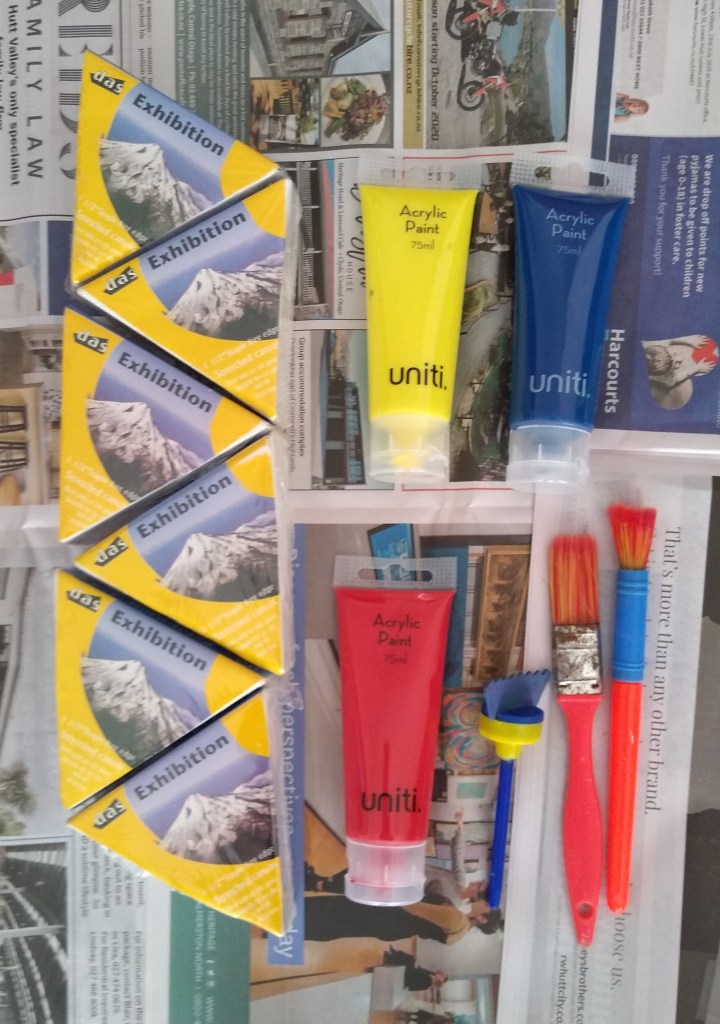
I haven’t posted in a few weeks as I have been setting up some longer term gardening projects. We have had a bit of fun mixing colours for this art project.
Things you will need:
10 cm triangle canvasses Red, blue, yellow and white acrylic paint variety of brushes clear glue Rainbow coloured embellishments (gems, beads, pompoms etc…)
Instructions:
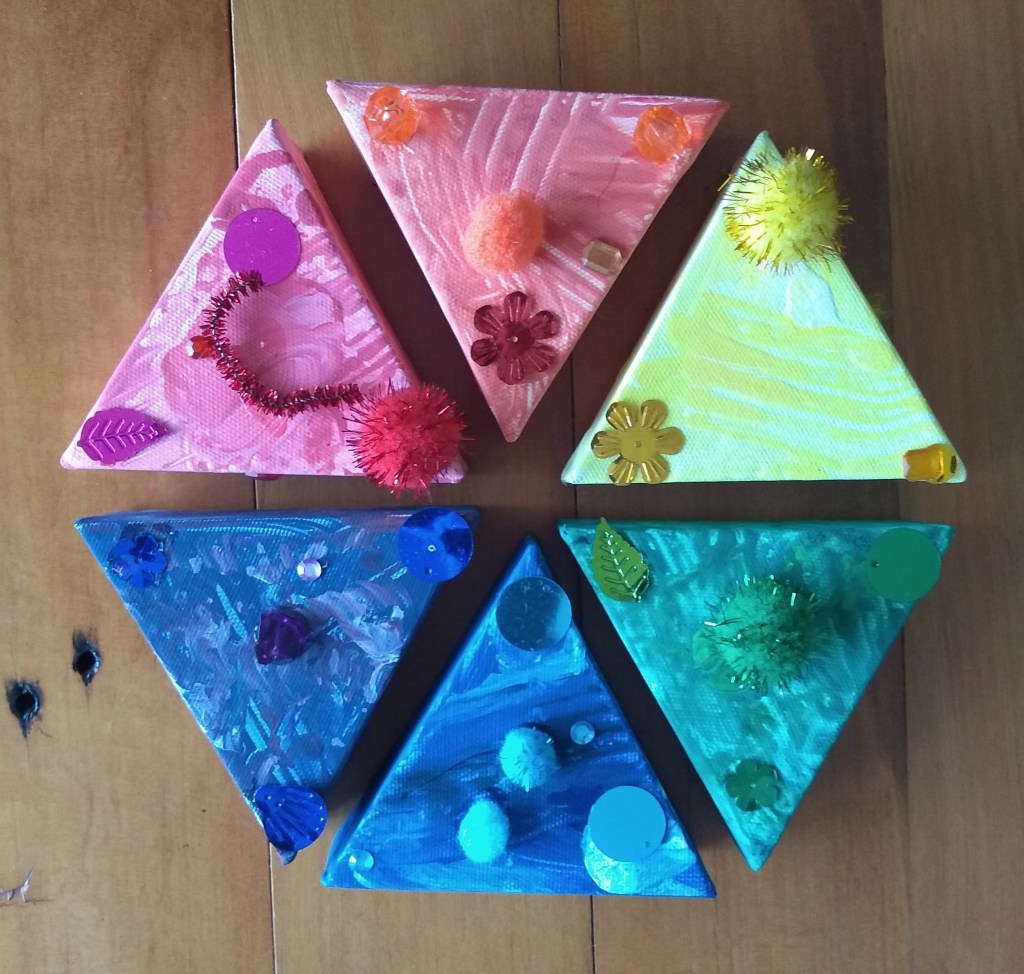
Mix the desired colour of paint first. Then, on a tray, mix in a gradient of white paint to get different shades of the colour. Painted each of the canvasses a different rainbow colour, using different shades with different brushes.
Let the canvasses dry.
Using the clear glue, attach matching coloured embellishments to each canvas.
What the kids can do:
I helped mixing the paint colours, but Miss 5 did all of the painting and decided where to stick the embellishments.
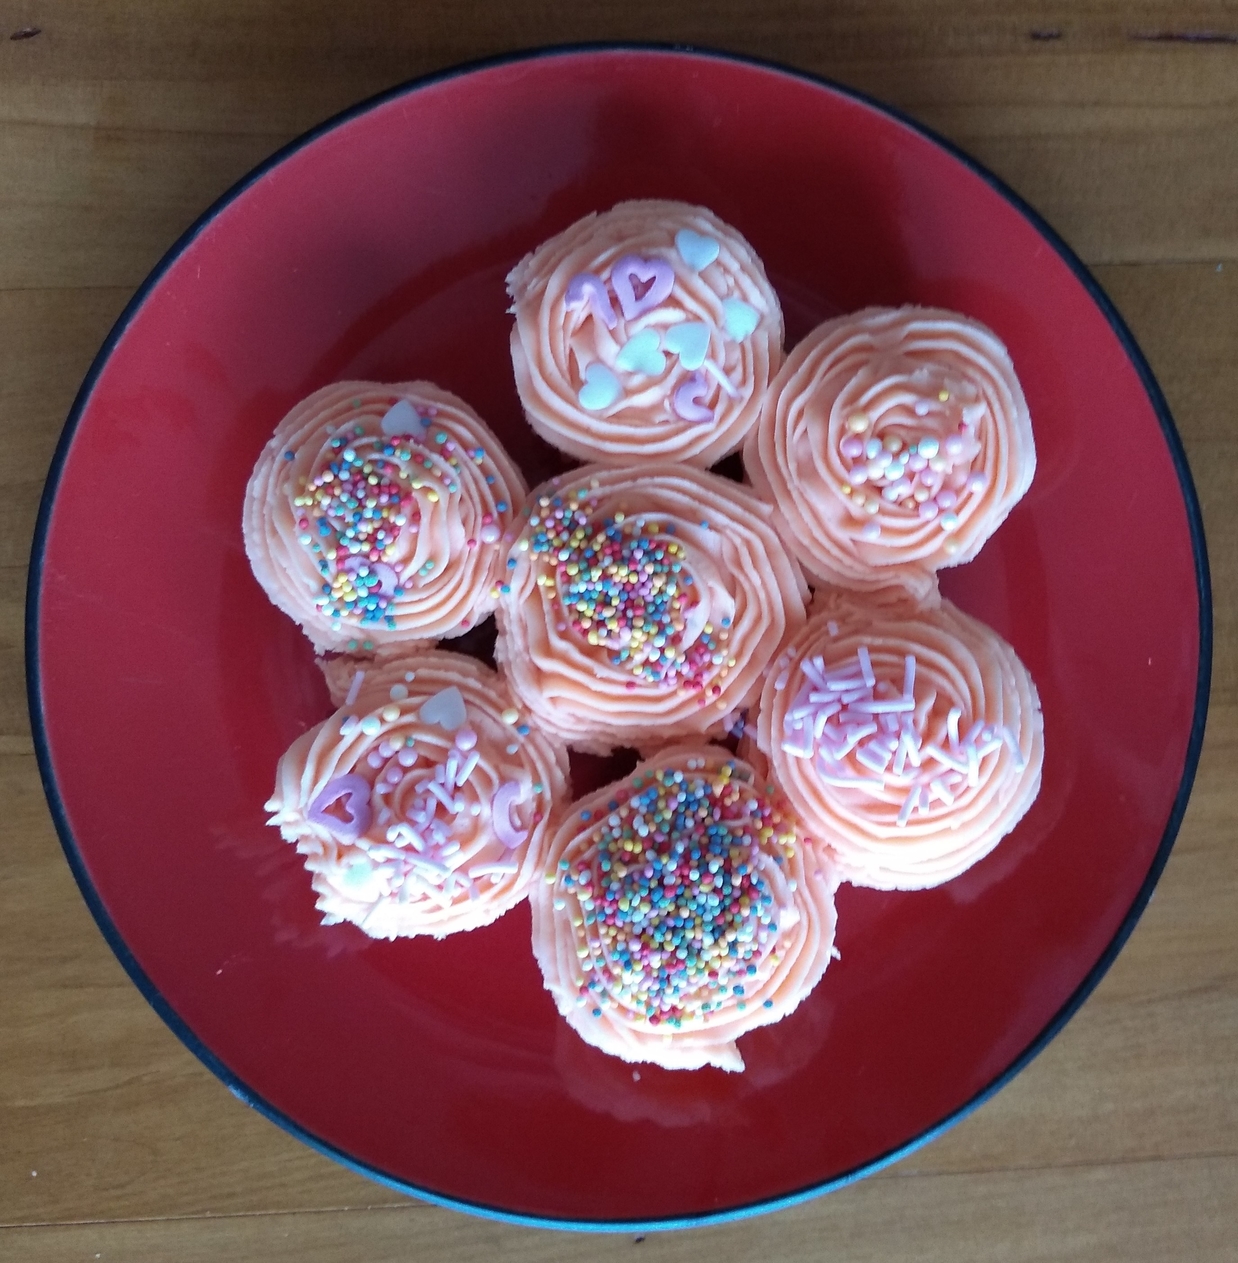
Miss five has been asking for a while tom make some cupcakes, so this weekend, we did. I managed to talk her into putting some fruit in them, so at least they contribute to the 5 + a day. The fruit of choice… apricots (of the tinned variety). We based this on a Chelsea sugar recipe for peach muffins.
Ingredients:
Apricot cupcakes:
1 3/4 cup self-raising flour 3/4 cup white sugar 1/2 teaspoon baking soda 125g butter, melted 2 free-range eggs 1 teaspoon vanilla essence 3/4 cup milk can of apricots, well drained and chopped to ~1cm3
Preheat the oven to 180°C (356°F). Place cupcake liners into a 12 hole muffin pan. We made a few batches of mini muffins to freeze and add as a treat to lunch boxes.
Sift together dry ingredients in one bowl, and combine wet ingredients in another. Fold wet ingredients into dry ingredients.
Fill 12 cupcake liners with mixture and bake at 180°C (356°F) for 20 minutes or until cupcakes spring back when touched.
These cupcakes are great to eat just on their own and freeze well.
Butter icing:
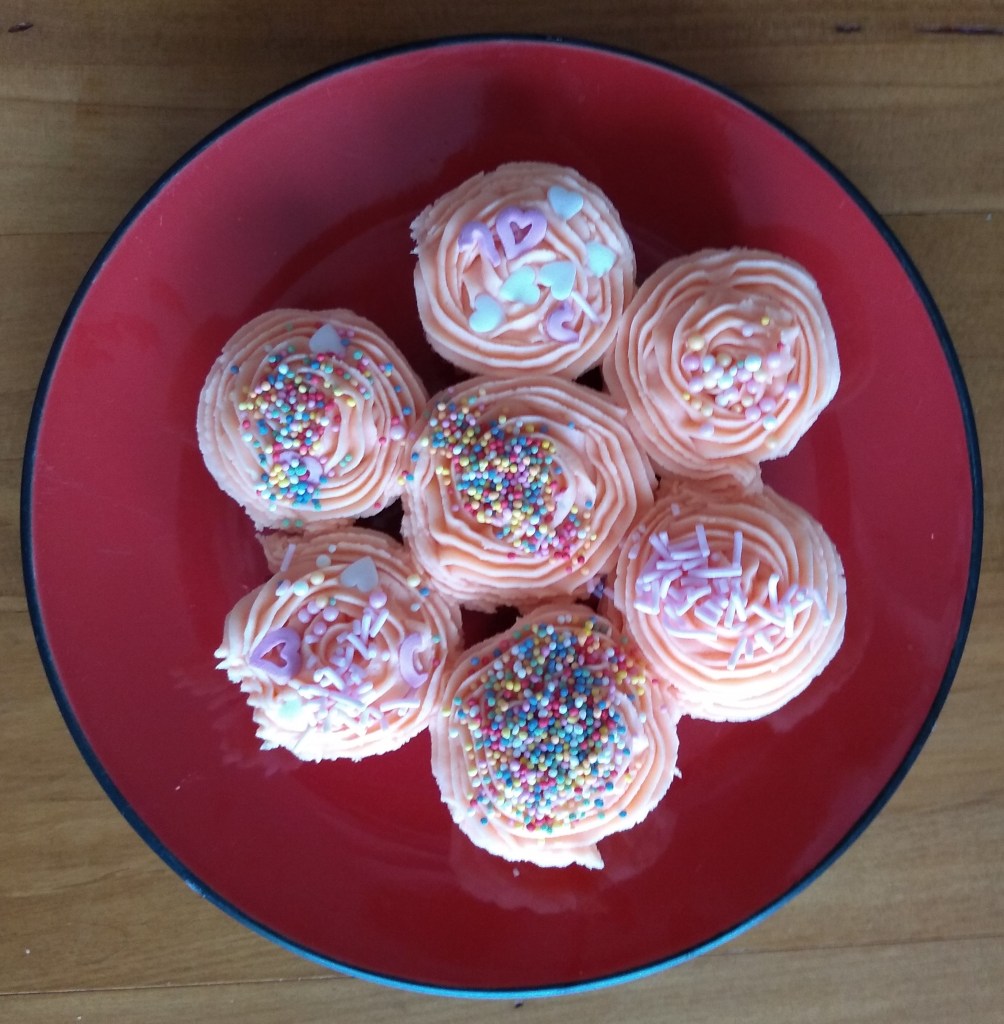
Combine butter, icing sugar and food colouring in the food processor. Mix until combined. Add milk until the icing is of a good piping consistency. Pipe on top of the cupcakes using a star shaped piping tip.
What the kids can do:
Hand washing: Don’t forget to get the kids (and grownups too of course) to wash their hands before you start. Little hands always seem to end up touching everything, including the ingredients. This is extra important given the current Covid-19 situation. For good 20 second hand wash, have them sing “happy birthday to me” twice.
Eggs: Pro tip for breaking eggs with a 5 year old, break eggs into a separate glass bowl before adding to your other ingredients. That way you can see and pick out any bits of shell before they are added in by mistake. I like to use free range eggs, because it is kinder to the chickens, and they also taste better. Bear in mind that raw eggs can carry Salmonella so wash little hands if they end up the raw egg. I also don’t recommend eating raw cake batter, just in case.
Mixing the ingredients: My daughter (age 5) helped mix all the ingredients. the biggest messes seen to happen when sifting and mixing dry ingredients with the kids. A great tip from reader Dana M is to put a towel down underneath, which catches any stray ingredients for easy cleaning. When fold wet into dry ingredients, you want to mix thoroughly, but not too much or the cupcakes will go flat, this usually requires the grown up to either finish off the mixing and/or intervene before things are mixed too much.
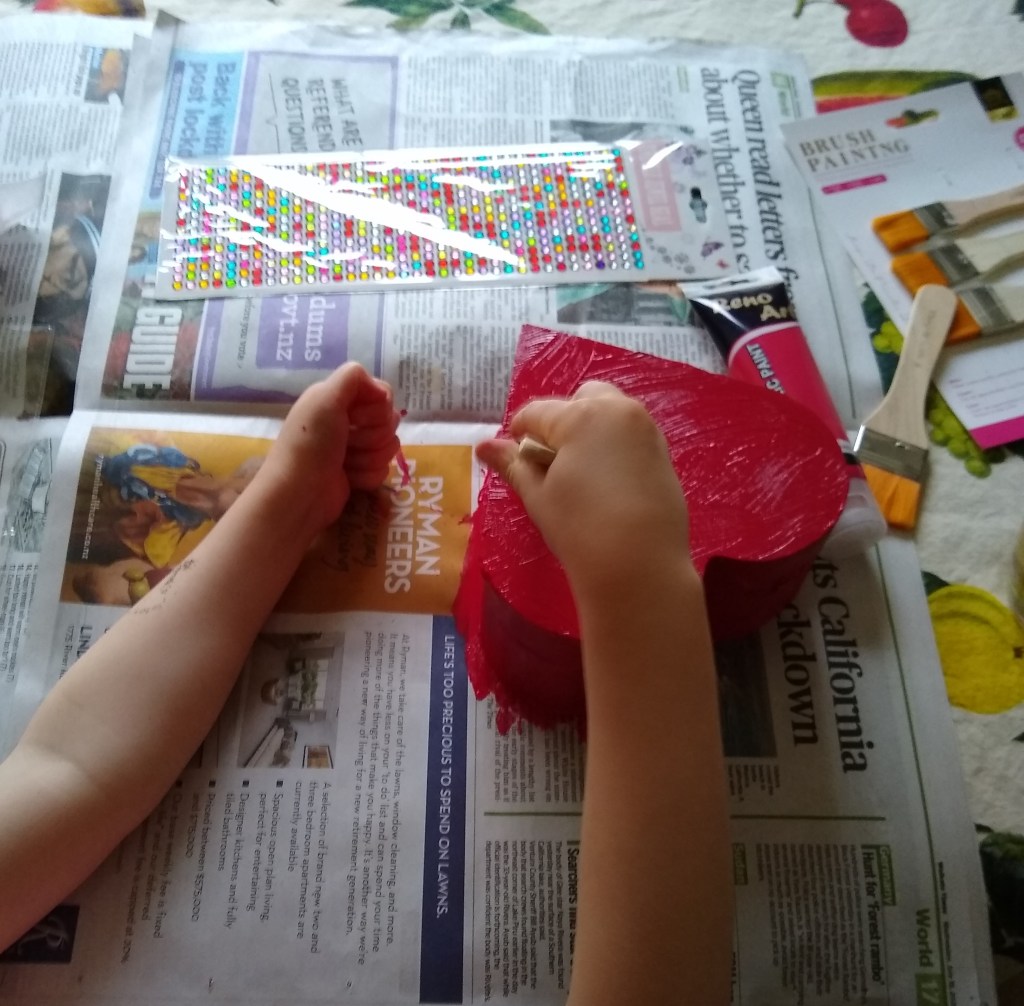
While we were on holiday and visiting Nana and Grandad, I wanted to get a quick craft project we could complete away from home. I dropped into a dollar shop and picked up some supplies. A great little project that can be used later to keep a 5 year old’s little treasures in.
Things you will need:
A plain wood heart shaped jewelry box Red acrylic paint Paint brush Gemstone stickers
Instructions:
Paint the box red all over. Wait to dry. In hindsight, we should have dried the box open, as it got stuck shut. Daddy fixed this though, with his pocket knife. Stick on the gemstone stickers as desired. These ones did not stay stuck very well, so we will likely put a coat of mod podge over it all to keep them stuck.
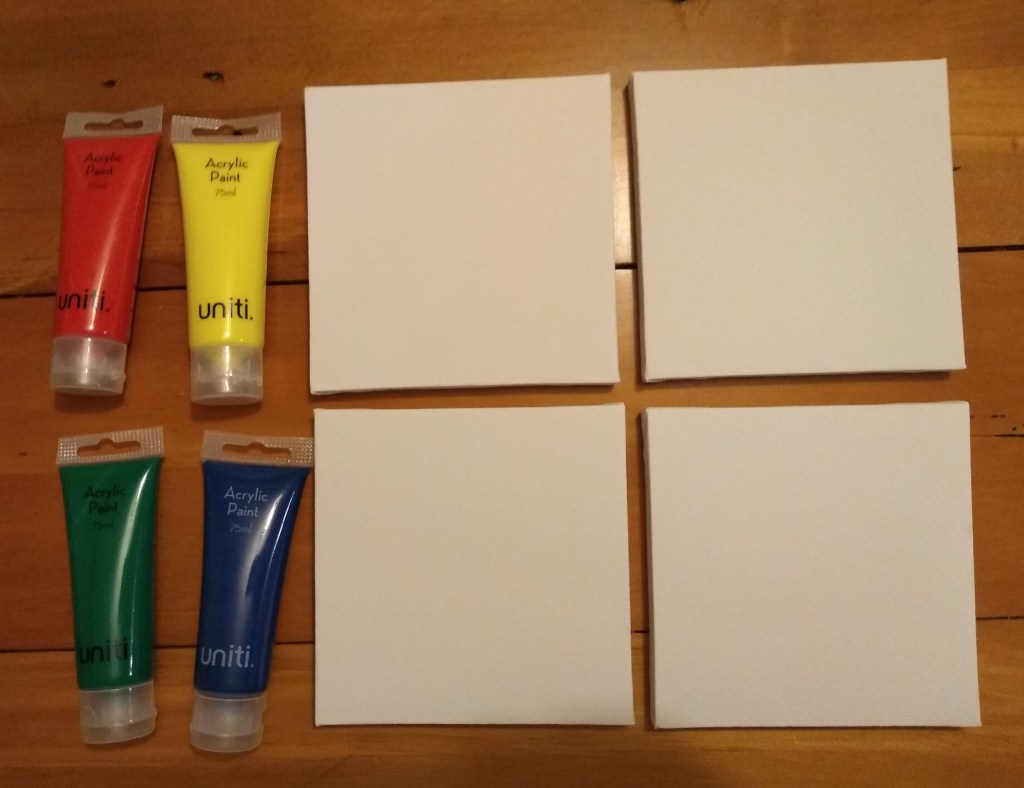
I am trying to be organised this year – OK I try every year to be organised, and it rarely works out. We decided to start making christmas presents for family. What better gifts grandparents that presents made by little hands (or feet)!
Things you will need:
Acrylic paint various colours Paint brush 15cm x 15cm canvases
Instructions:
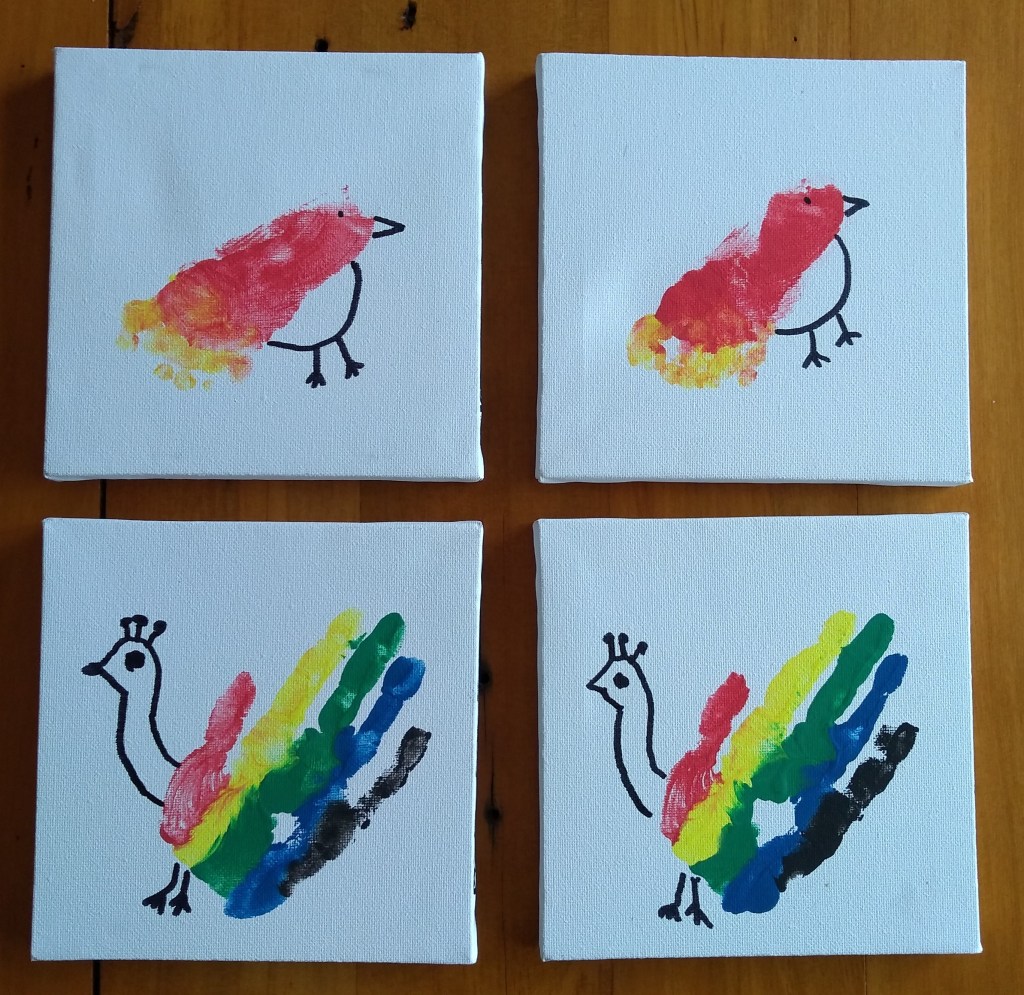
Paint hands or feet in the desired manner. Press onto small canvas. Convert the hand/footprint to a bird, first in pencil. Ideas for this can be found on Pinterest. Then in a more permanent ink. Write the prints owner and age on the side of the canvas.
What the kids can do:
Miss 5 wanted her hand painted in a rainbow. I did the painting, she did the printing. She also painted her baby brothers foot red with yellow toes. I did the printing, which was substantially easier than the time we did a baby hand print. I then drew on the bird in pencil and showed Miss 5 how to go over this on the footprints. She went over the bird shape for her hand print. We made a pair for each set of Grandparents.
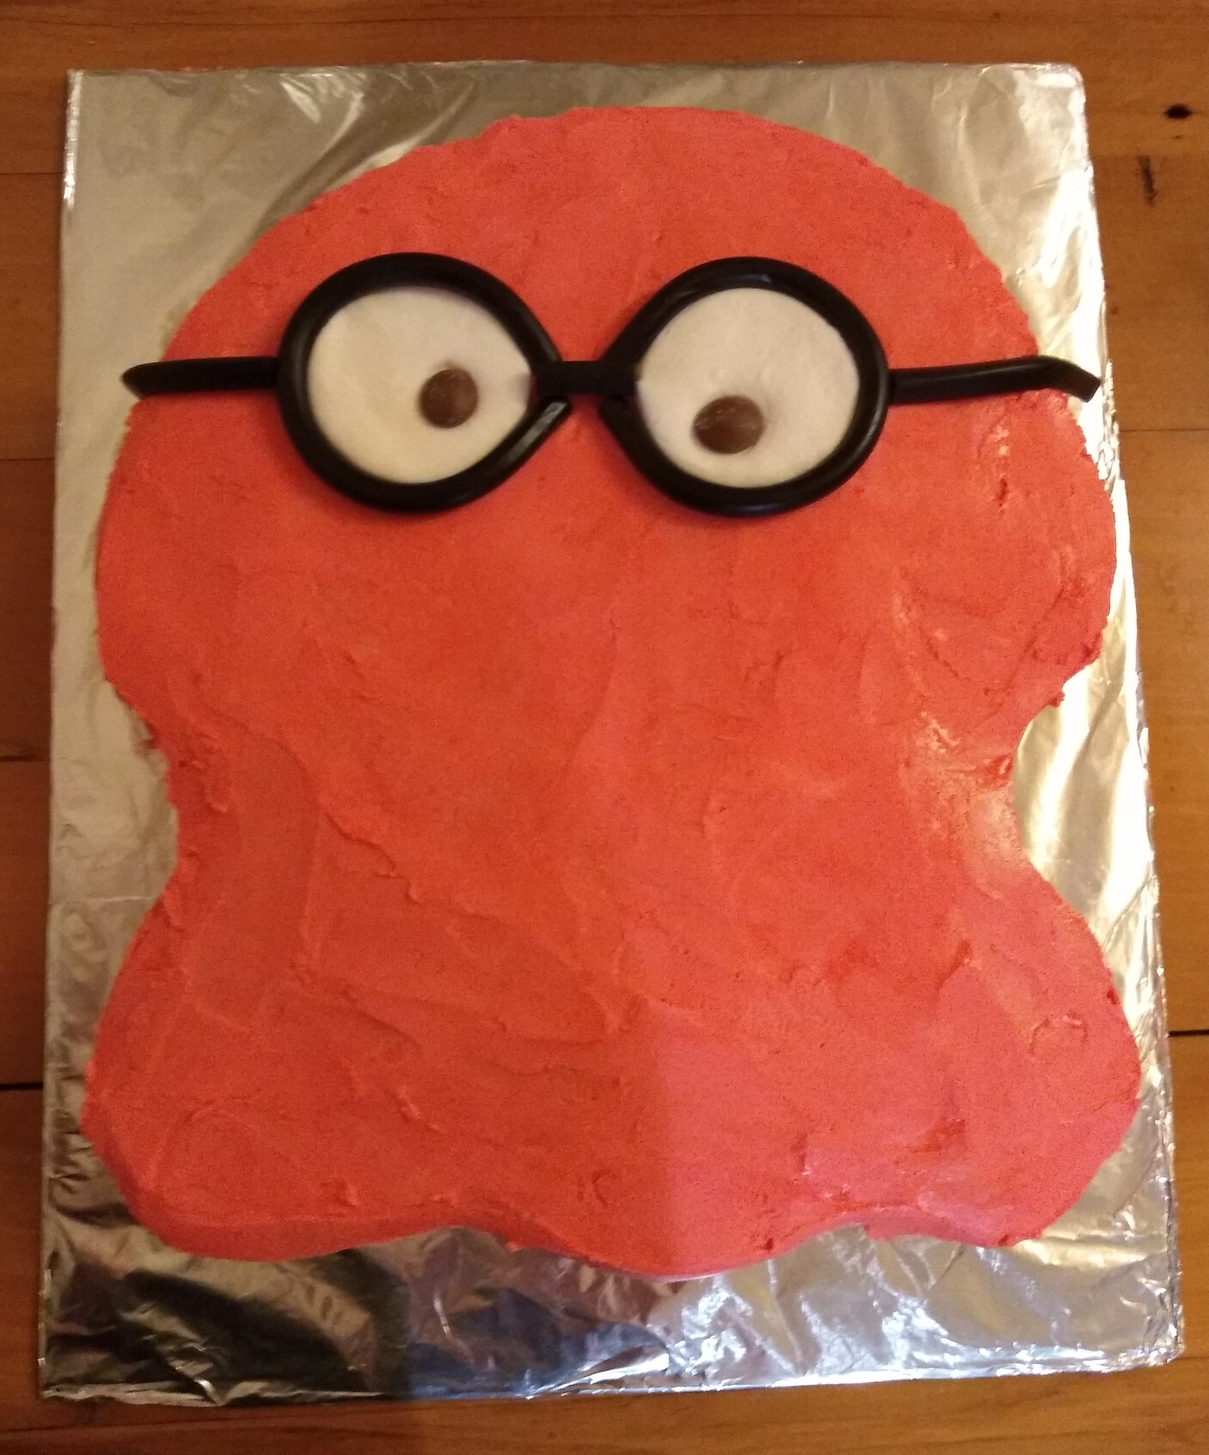
Miss 5 is a huge fan of the Slick Slime Sam YouTube Channel and for her (Covid-19 belated) 5th birthday party she wanted a Slick Slime Sam birthday cake. We made an extra large banana cake based on the Edmond’s recipe, covered it with pink buttercream icing (also based on the Edmond’s recipe), marshmallow fondant eyes, chocolate button pupils and licorice glasses. Here is how we did it…
Ingredients:
Banana cake:
250 g butter, softened 1 1/2 cups white sugar 4 free-range eggs 5 large bananas mashed 1/4 cup milk 2 teaspoons baking soda 4 cups self raising flour
Buttercream icing:
225 g butter, softened 4 cups icing sugar 1 teaspoon vanilla essence red food colouring water
Marshmallow fondant:
a handful of white marshmallows icing sugar
Additional items:
sheet of cardboard larger than the planned cake tin foil clear tape 1/4 cup apricot jam 1/4 cup boiling water 2 chocolate buttons licorice strips
Instructions:
Banana cake:
Preheat oven to 180°C (356°F).
Cream butter and sugar together until light and fluffy. Add free-range eggs one at a time, and beat in. Add in mashed banana and combine.
Sift flour into a large bowl, and make a well in the centre.
Boil milk in the microwave and immediately add the baking soda. Stir to froth up.
Pour frothy milk and other wet ingredients into the centre of the dry ingredients and fold together. Pour into a large rectangle cake tin (we used an oven roasting tray) lined with baking paper.
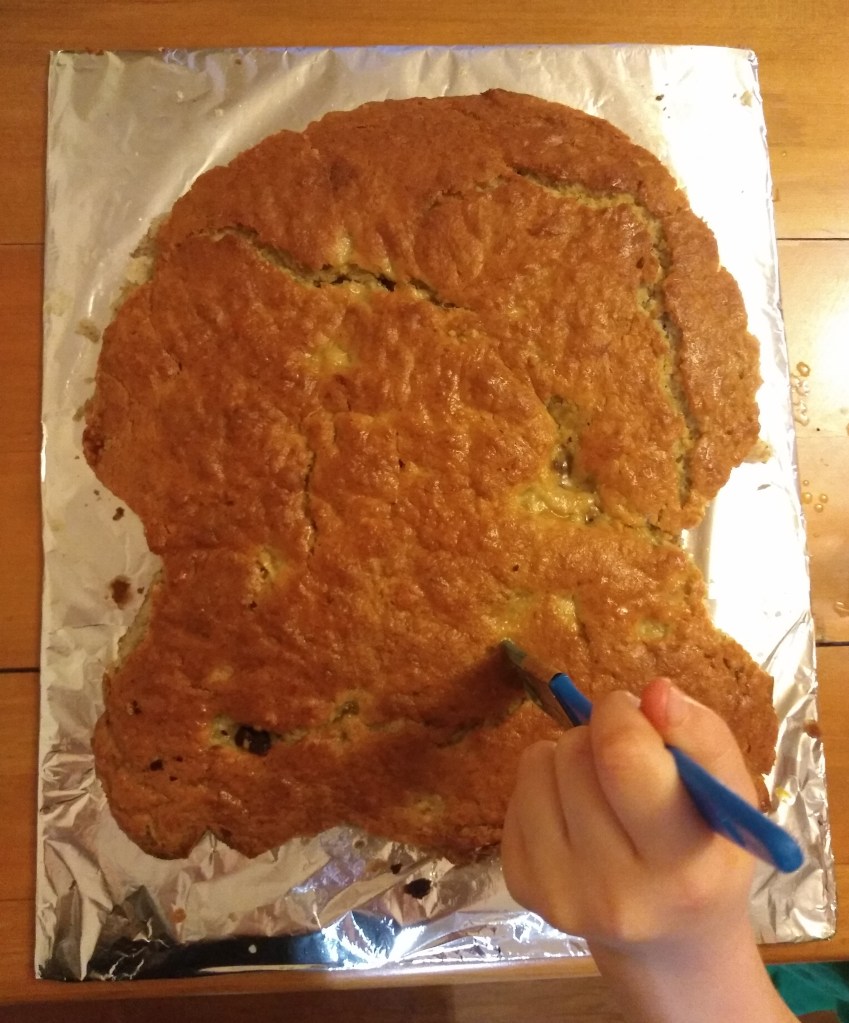
Bake at 180°C (356°F) for about 50 minutes. Allow cake to cool. Cut out a shape resembling Slick Slime Sam.
Cover the sheet of cardboard with tin foil and secure this in place underneath with clear tape. Transfer the cake onto the centre of this base.
Combine 1/4 cup of apricot jam and 1/4 cup of boiling water. Using a pastry brush, brush the cake, especially the cut edges with the mixture. This will reduce the cake crumbling as you apply the icing.
Buttercream icing:
Combine butter and icing sugar and vanilla essence in food processor and beat until combined. Add food colouring and mix until you achieve the desired colour. You can add a little water (or milk) to achieve the desired consistency.
Apply the icing to the cake and smooth over the sides and top until cake is evenly covered with icing. Dipping the spreading knife in boiling water can help to smooth things out nicely. Edges can be cleaned up with a damp cloth.
Marshmallow fondant:
Place the handful of marshmallows in a bowl and microwave until they puff up. Take them out of the microwave, and mix to combine melted marshmallows. Gradually add icing sugar until mixture comes together enough to kneed. Flour a board with icing sugar and kneed fondant until it reaches a good consistency to roll out. Roll our fondant and cut two circles with a cookie cutter.
Place marshmallow fondant eyes on the cake and add chocolate button pupils. Make glasses out of licorice strip – et voila! – you have Slick Slime Sam.
What the kids can do:
Hand washing: Don’t forget to get the kids (and grownups too of course) to wash their hands before you start. Little hands always seem to end up touching everything, including the ingredients. This is extra important given the current Covid-19 situation. For good 20 second hand wash, have them sing “happy birthday to me” twice.
Eggs: Pro tip for breaking eggs with a 5 year old, break eggs into a separate glass bowl before adding to your other ingredients. That way you can see and pick out any bits of shell before they are added in by mistake. I like to use free range eggs, because it is kinder to the chickens, and they also taste better. Bear in mind that raw eggs can carry Salmonella so wash little hands if they end up the raw egg. I also don’t recommend eating raw cake batter, just in case.
Mixing the ingredients: My daughter likes to help using the food processor to mix all the ingredients. Bear in mind that little hands can fit down the shoot of the food processor, so always supervise this step. The biggest messes seen to happen when sifting and mixing dry ingredients with the kids. A great tip from reader Dana M is to put a towel down underneath, which catches any stray ingredients for easy cleaning. When folding wet into dry ingredients, you want to mix thoroughly, but not too much or the cake will go flat. This usually requires the grown up to either finish off the mixing and/or intervene before things are mixed too much.
Icing the cake: It is quite hard for little ones to help getting the icing on the cake, but as it turned out Miss 5 was more interested in licking the spoon anyway. Eventually, I got the icing smoothed to my satisfaction and Miss 5 got her wish. Fortunately, there was not much left over. Likewise some marshmallows and licorice did not make it as far as the cake. Never mind, you only turn 5 once (or twice if your birthday happens to occur during lockdown for a global pandemic).